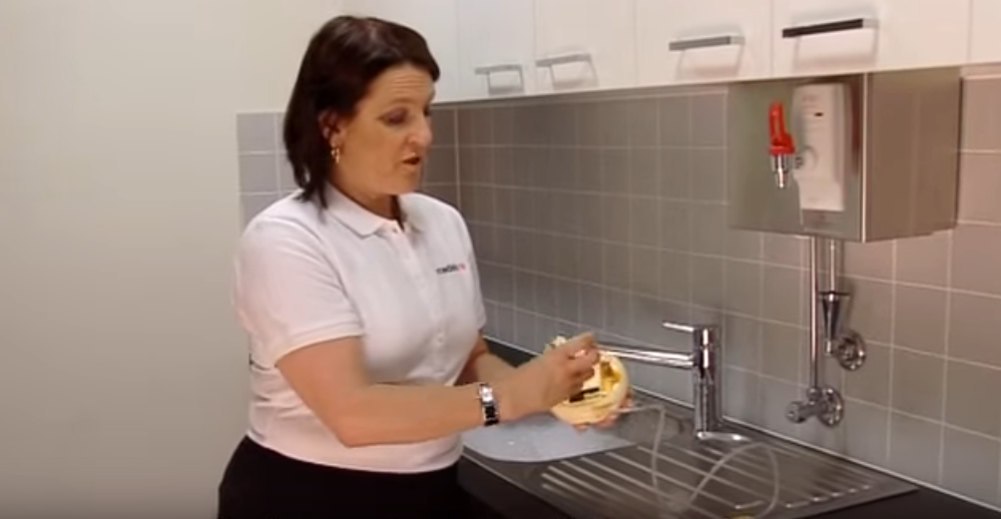
Lipase is an enzyme that helps digest fat. This enzyme is found in breast milk and it is very valuable as it helps your baby digest breast milk. If you have an excess of lipase in your milk, the enzime will start breaking down the fat in it faster, even before it is consumed by your baby.
What happens if I have excess lipase in my breast milk?
Lipase can act faster depending on the levels of the enzyme in your milk. The enzime will affect the smell and taste of your milk, which will be one or many of the following: sour, rancid, soapy and / or metallic.
If your baby is refusing to take his/ her bottle, there may be excess lipase affecting your milk’s taste.
How do I know if there is excess lipase in my breast milk?
Talk to your physician or lactation consultant about your concerns and they will tell you how to proceed in your specific case.
One indication that you may have excess lipase in your breast milk is the smell and/ or taste of your expressed milk. Try leaving your breast milk at room temperature and taste/ smell it regularly to understand at what point it starts to change in smell and flavour.
This timing is important as it will give you a reference of how long you can keep your milk and feed it to your baby before it goes bad.
According to the CDC human breast milk can remain at room temperature for 6 to 8 hours, which means you have that amount of time to do the test before the milk goes bad. Remember to cover your container and keep it as cool as possible.
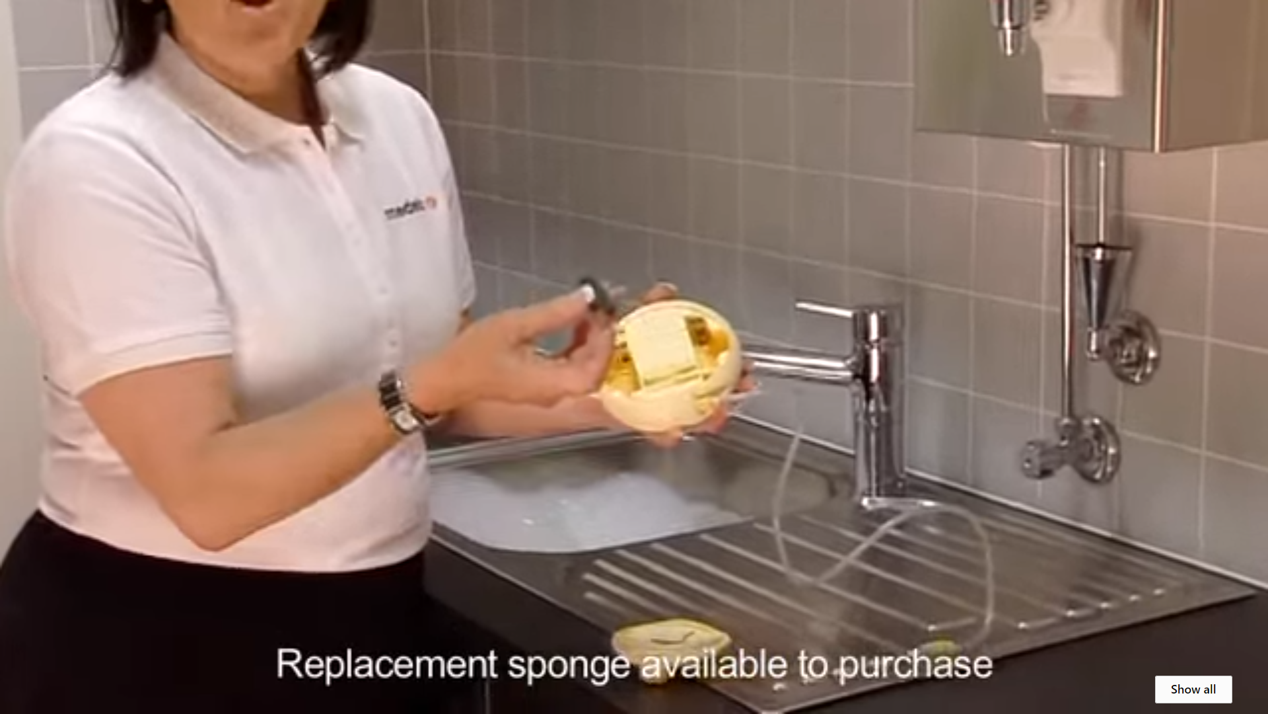
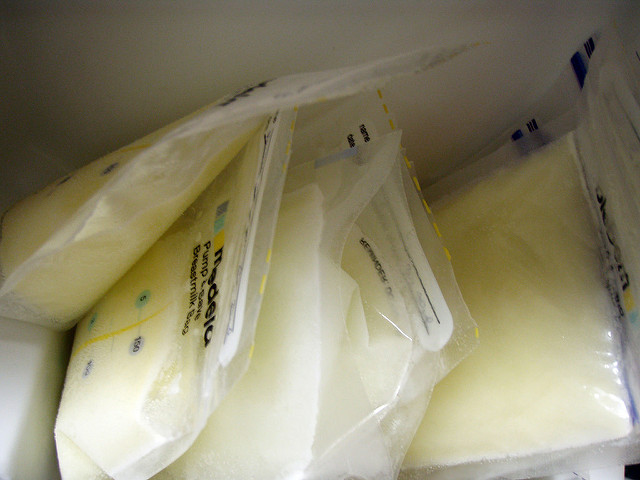
You may be thinking, what if I freeze my breast milk immediately after expressing it? Unfortunately, that won’t stop lipase from acting; which means you could end up with a freezer full of milk containers that smell.
Solutions to lipase in breast milk
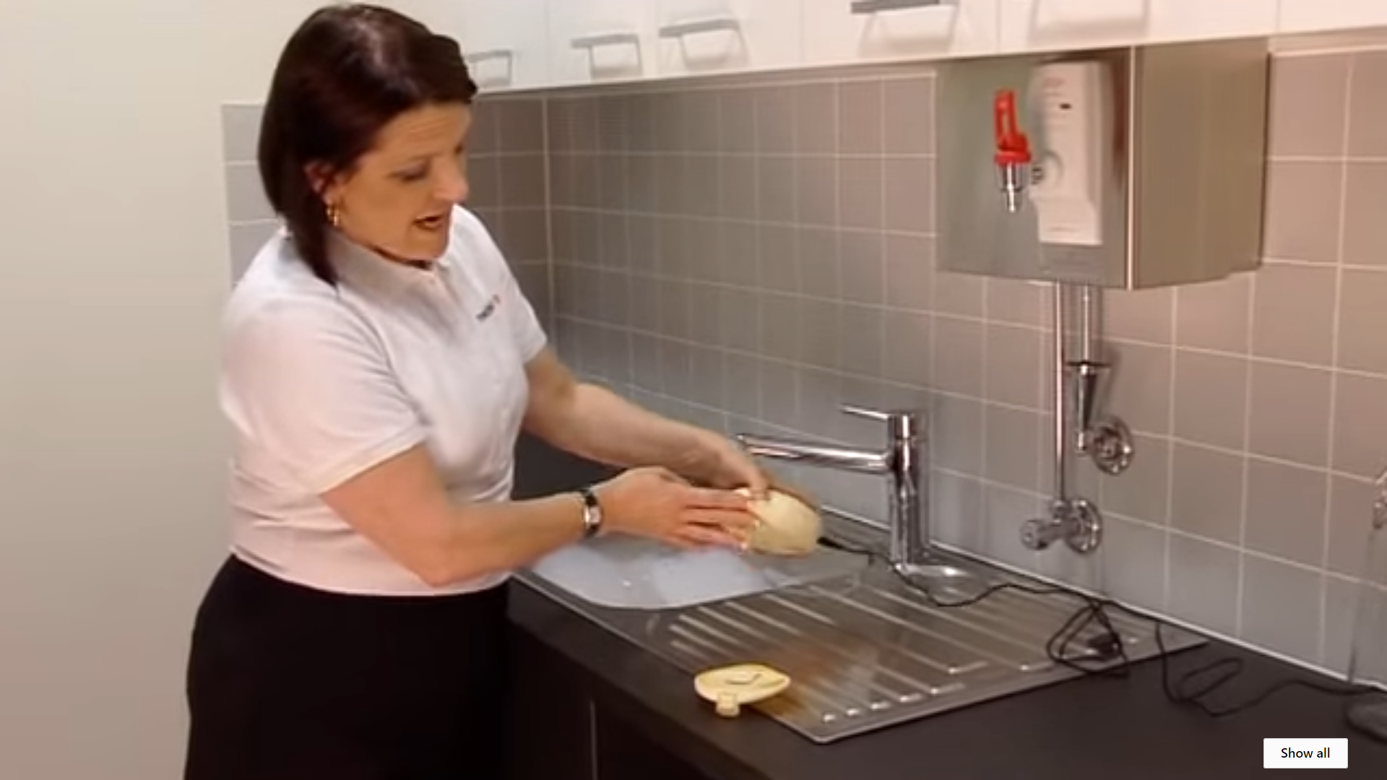
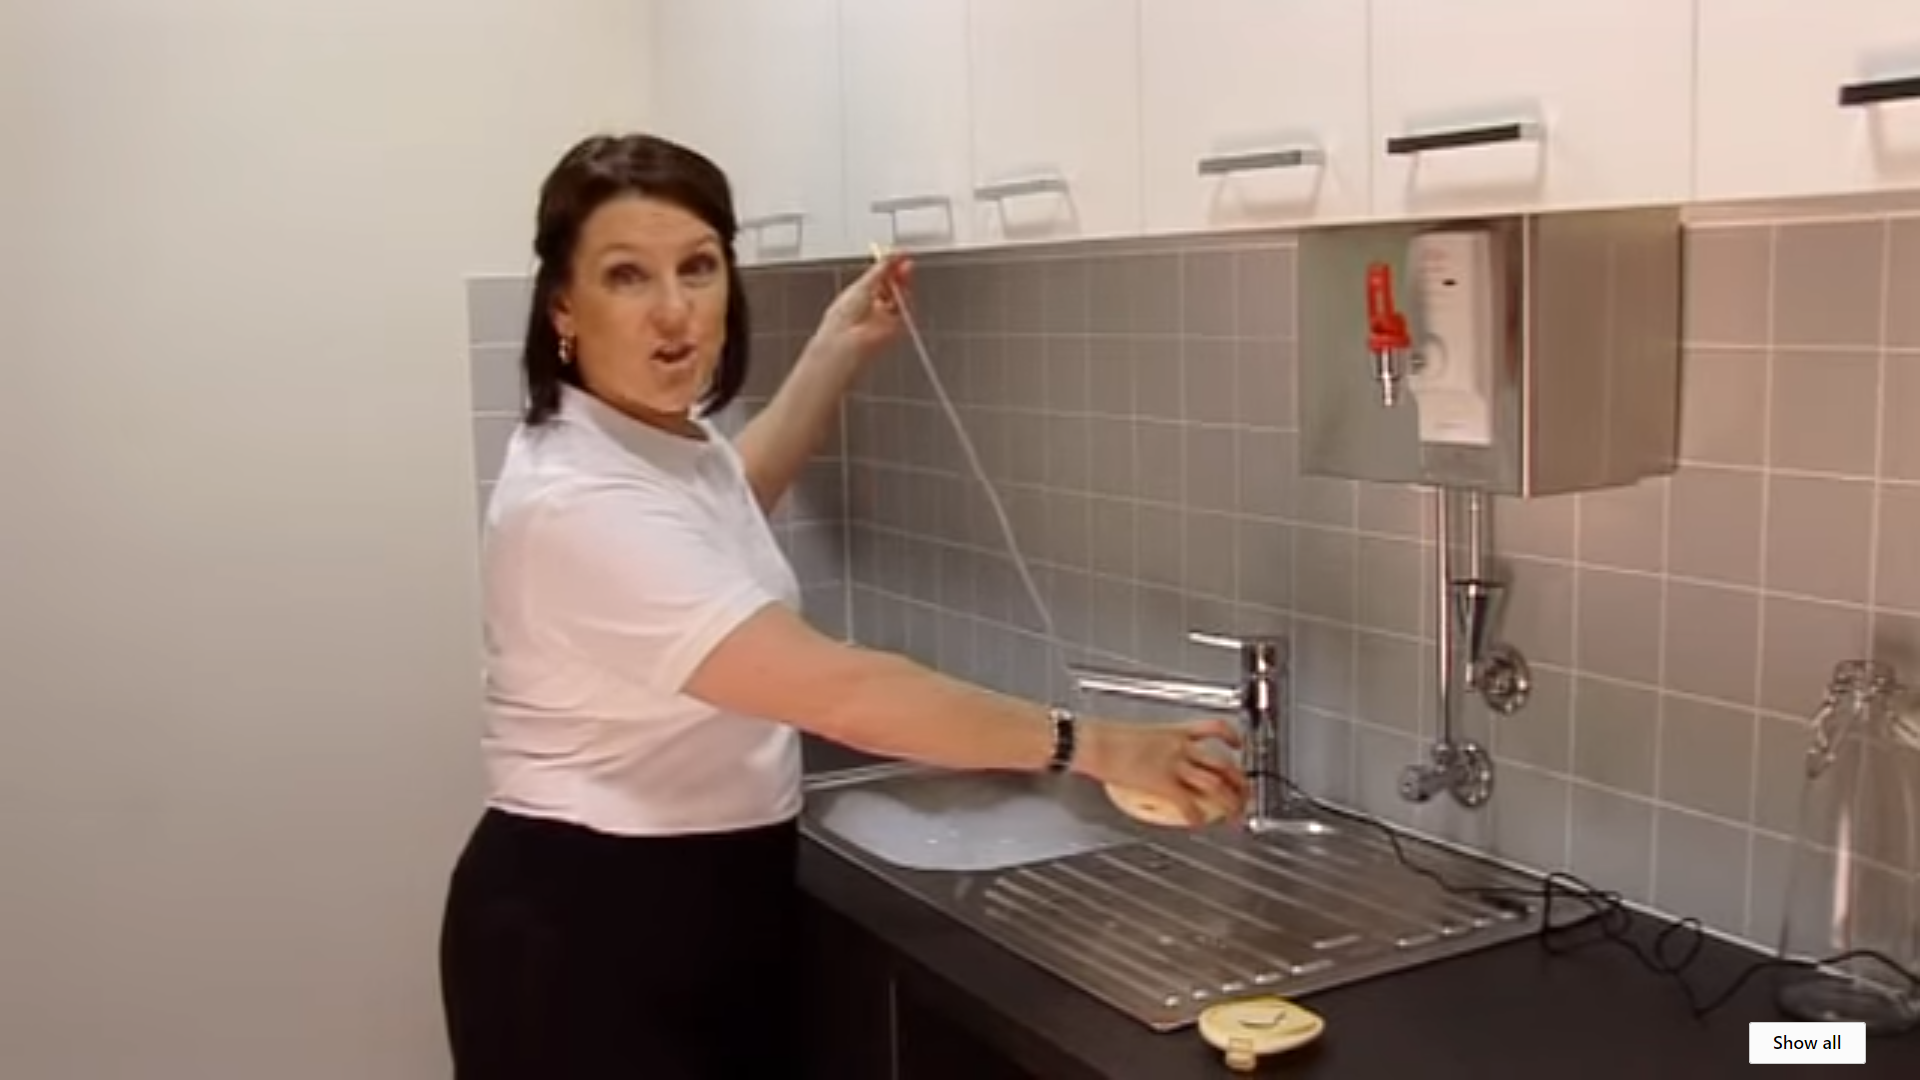
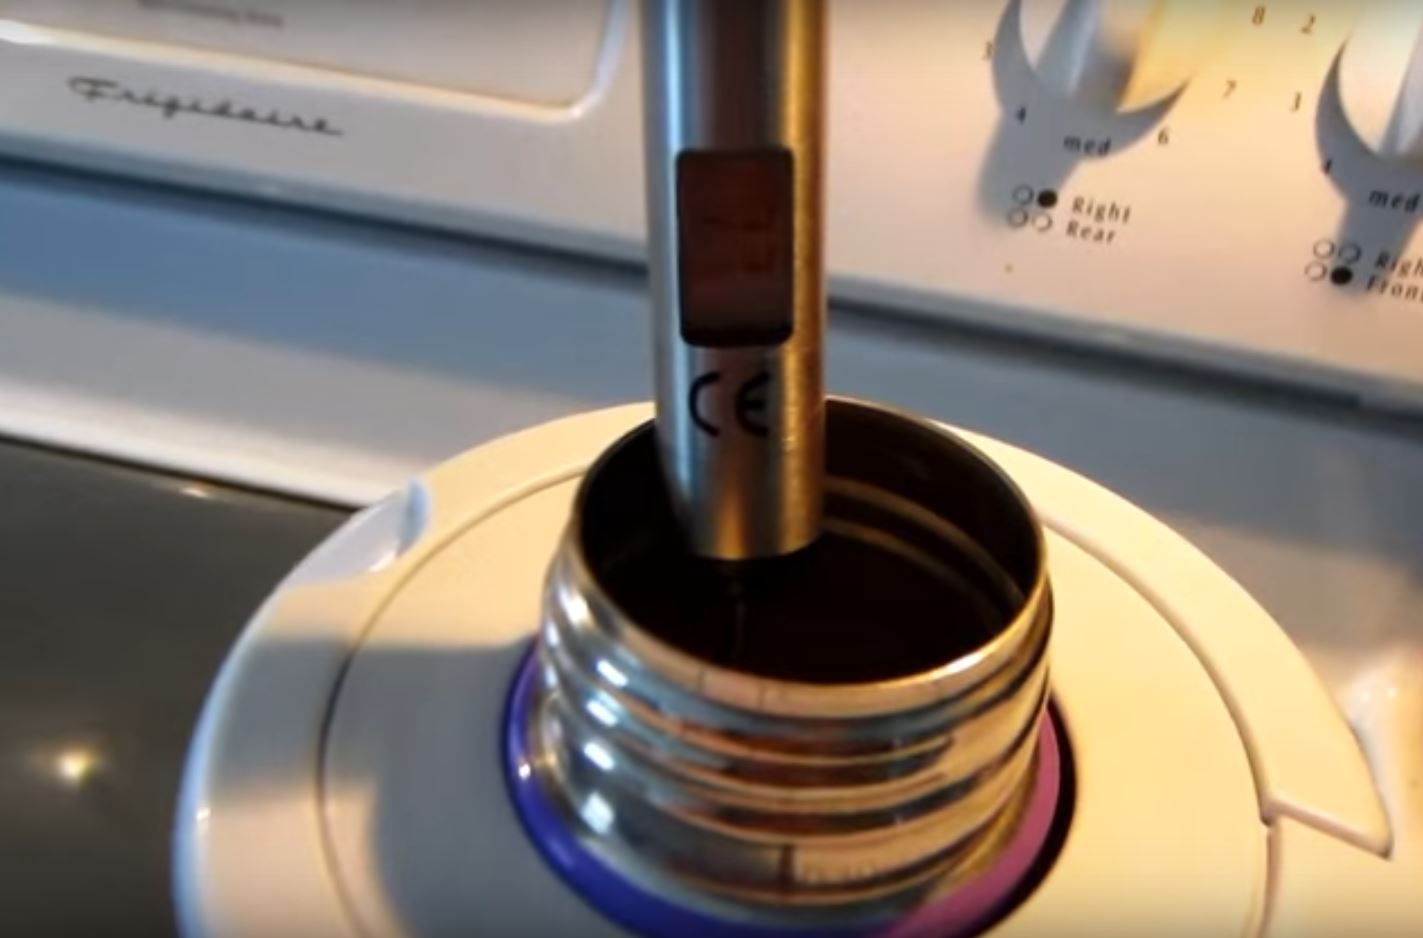
You can “rescue” your breast milk by scalding it. It is recommended you scald your milk as soon as you express it, or before lipase starts breaking it down. In order to know how much time you have until lipase starts acting, we recommend you do the explained in the section above, as it can be different for different women.
We have found 2 great blogs that have information about this and we have summarised them below.
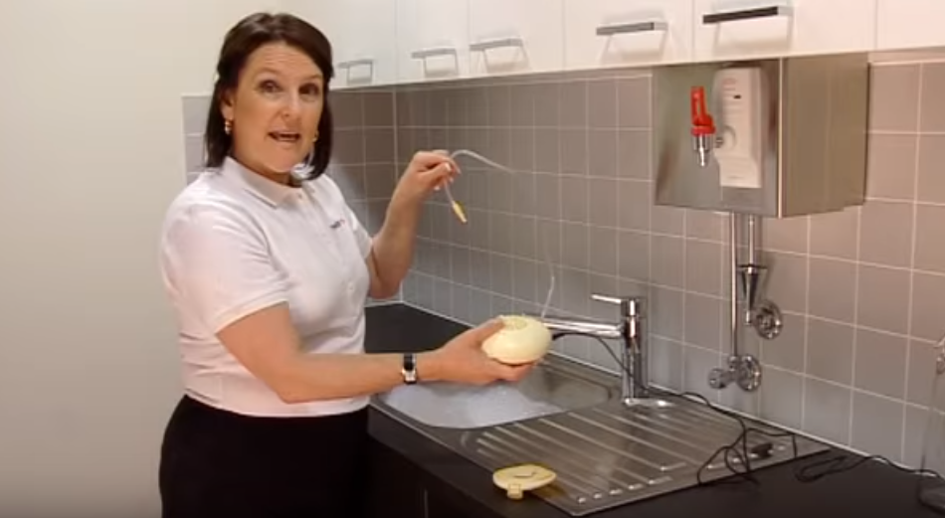
To scald your breast milk you will need the following:
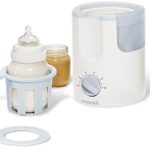
– A bottle warmer without an auto-shut off feature
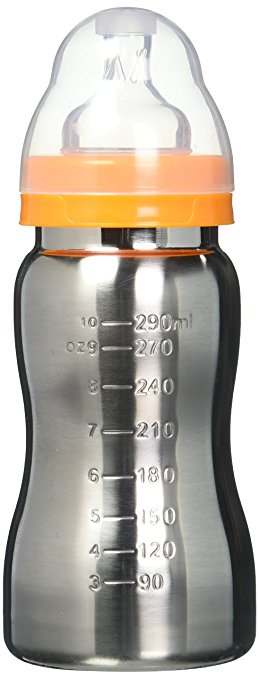
– An aluminium bottle
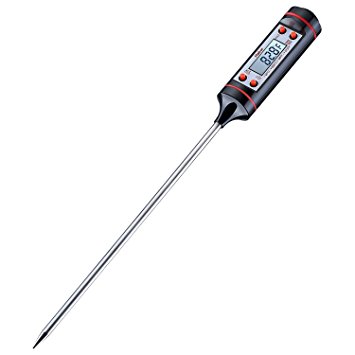
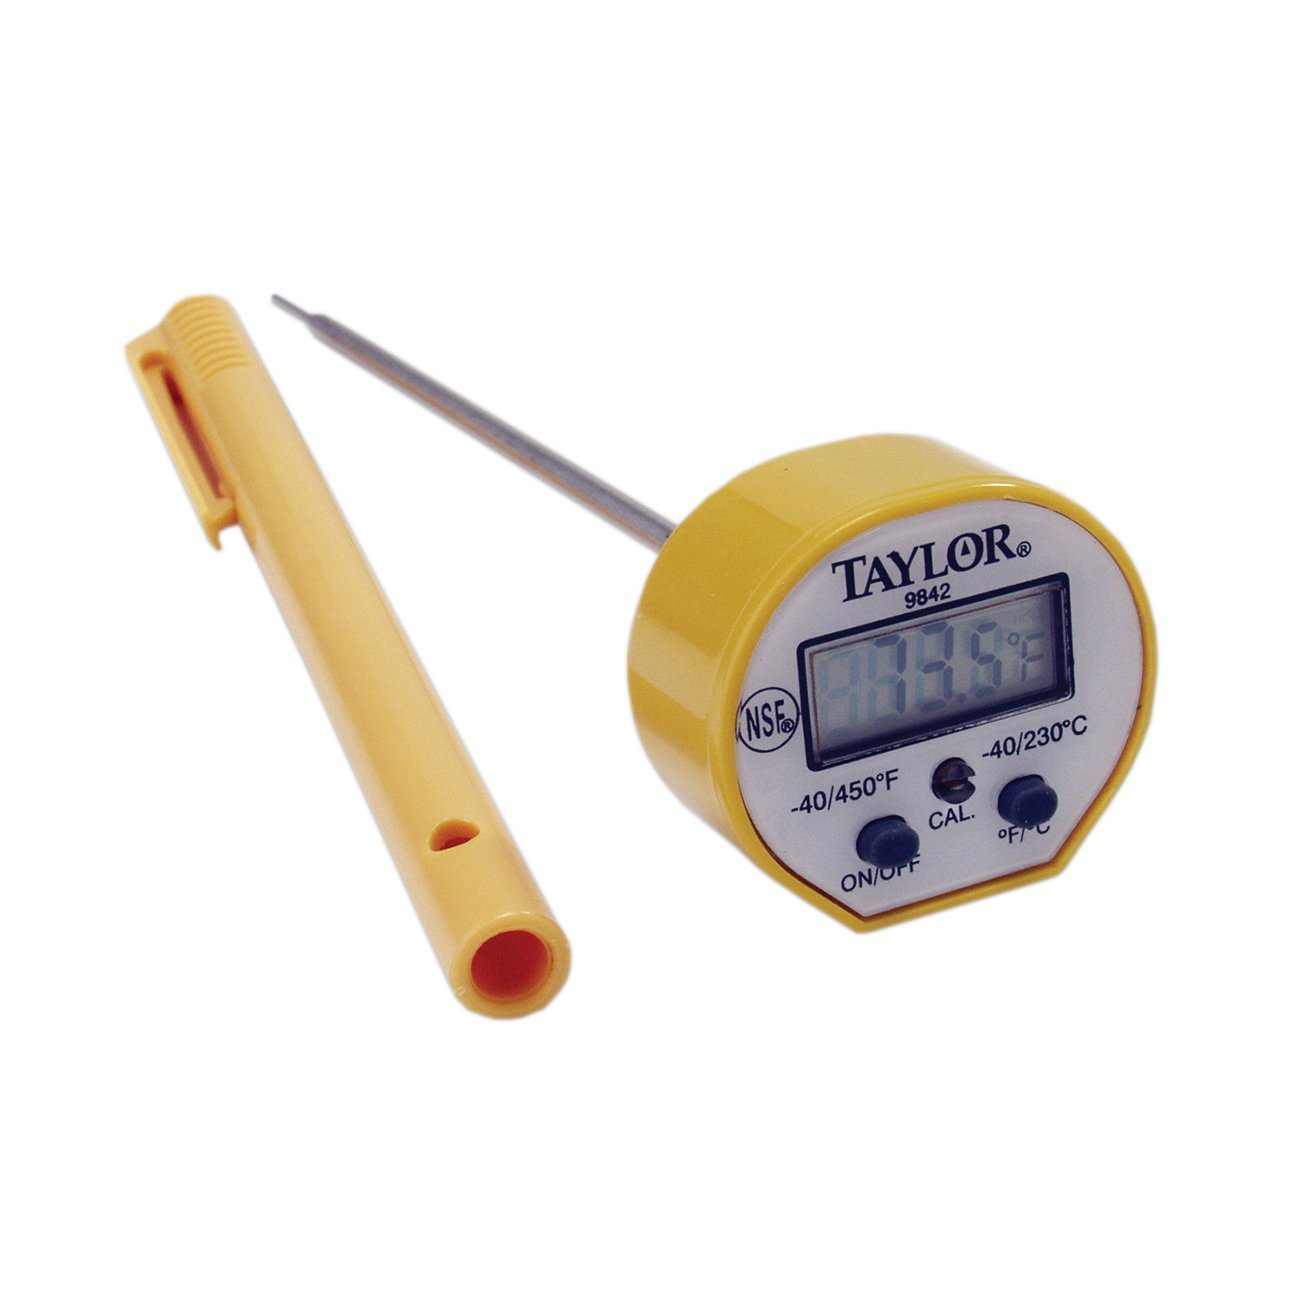
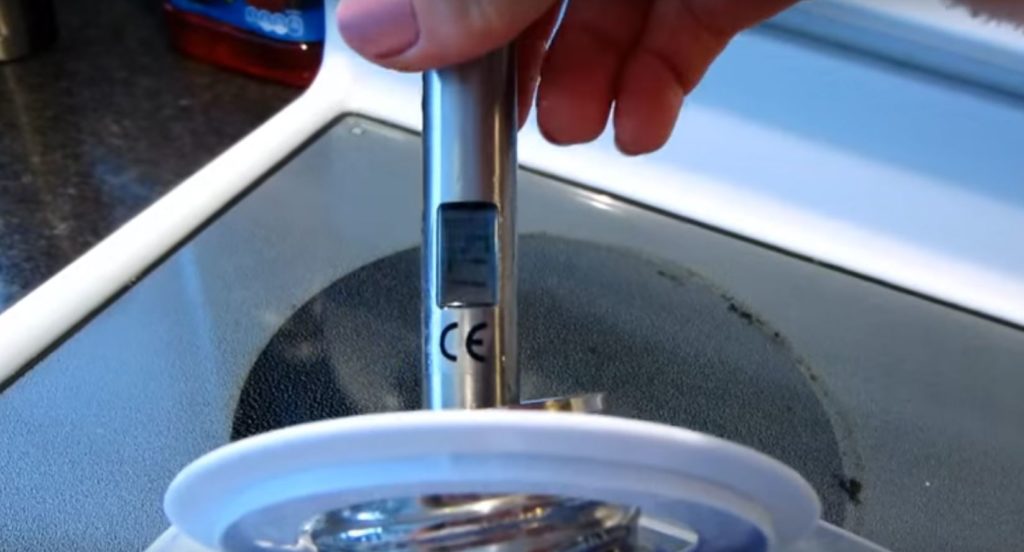
– A digital stainless steel thermometer
– A container filled with water and ice (any container you may have at home)
The full kit will cost you approx. $70 depending on what products you choose
Product Photo
Kit options
Description
No. of Amazon Reviews
Rating
Price
Check Out on Amazon.com
Anpro DT-7 Instant Read Digital Cooking Thermometer
With Long Probe for Milk, Meat, Candy, BBQ and Bath Water. Temperature range from -58°F to +572°F and -50°C to +300°C
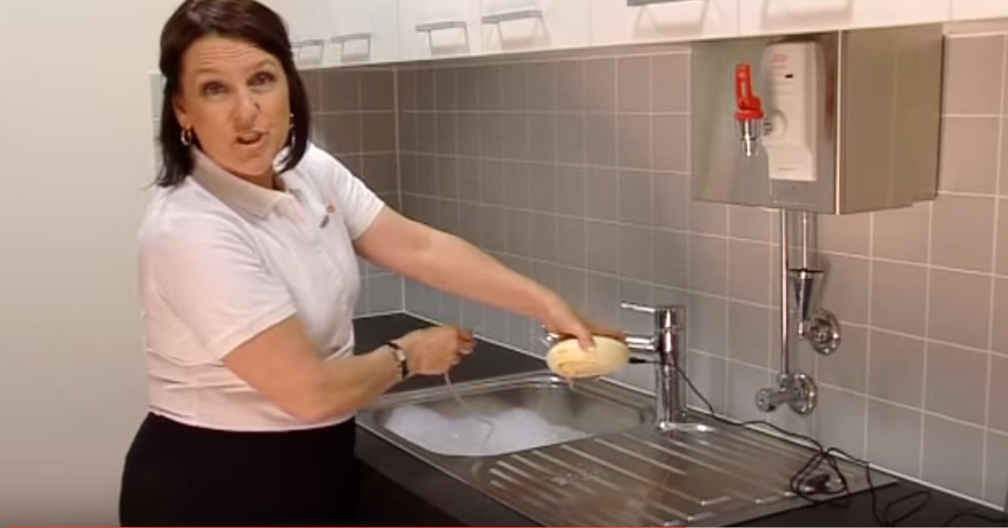
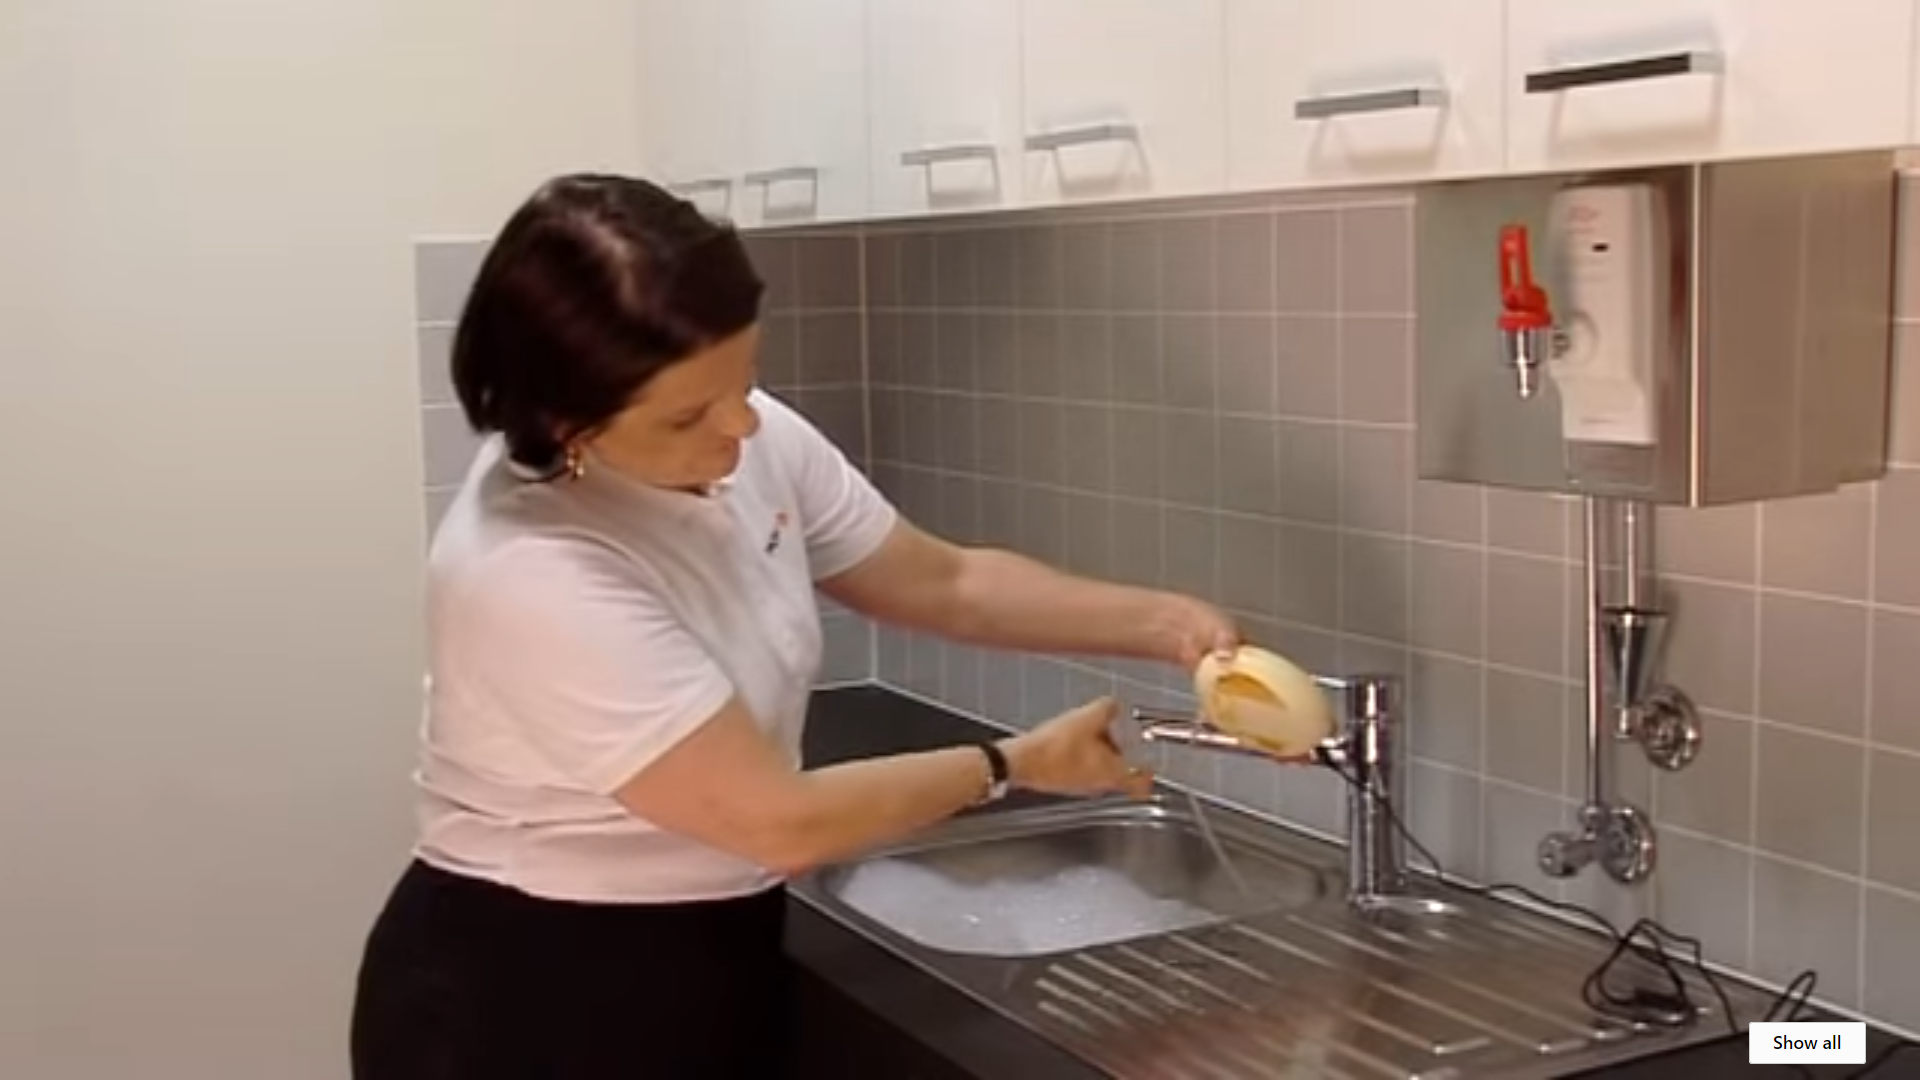
2. Put the aluminium bottle in the bottle warmer with the thermometer
3. Fill an empty container with water and ice
4. Once the thermometer marks 175-180 F (approx. 80ºC), take the bottle out of the bottle warmer and place it in the container filled with water and ice
5. Wait until your milk is cool to store it
After scalding your milk some of the nutritional values will be lost, however, it may be better to do this process instead of changing to formula altogether.
If your milk takes 12 to 24 hours to change in taste, you can still feed it to your baby that same day if you express before you go to work. Scalding your milk may not be necessary in your case.
If you want to build up your freezer stash, you will probably need to scald your milk as the low temperatures in the freezer don’t stop the process of lipase breaking down the milk.
If you would like to review the reference blogs to this article, don’t miss the video from ManD627 and also the blog from the San Diego Breastfeeding Centre LLC.
Finally, if you think you may have lipase in your breast milk, we would advise you contact either your physician or your lactation consultant for advice. This website does not provide medical advice, only information based on how other moms have dealt with the same issue.
We hope this article was helpful guide around how to deal with excess lipase in your breast milk.
There are many and different breast milk storage systems available. If you are reading this article you are very likely to have a very little baby and you are either breastfeeding and / or expressing milk.
Either way, you will need a container to store your milk and in this article we will review the best breast milk storage bags, their use, practicality, pros and cons, brand reviews and also where to buy them.
If you are in a hurry, you can refer to our comparative table below, or simple click on the list below to go where you need to:
These are the reasons I recommend breast pump bags as the best breast milk storage system:
BPA-Free
Which means they are free of Bisphenol A – a chemical used in the production of polycarbonate plastics. That means they are safe to store your baby’s milk.
Ready to use
Breast milk storage bags are pre-sterilised, which means they are ready to use as you don’t need to do any prior sterilisation. In terms of time saving, this is a huge advantage vs. other breast milk storage containers.
They can be stored in the fridge and freezer. Some designs are ideal for stacking on top of each other, whilst others are best for free-standing.
Room saving
They take less room than baby bottles and other hard containers as they can lay flat one on top of each other or next to each other. It is very important to note that it is key to have the bags properly sealed in either case in order to preserve the milk in its original condition and save all nutrients.
Breast milk warms up faster in storage bags than in other containers, as their material is thinner. Just pour some warm water in a container, and submerge the breast milk storage bag in it. Then wait a few minutes until the milk is at room temperature to feed it to your baby. Make sure you gently remove the milk fat from the bag by handling it before you pour the milk into your chosen best breastfeeding baby bottle. To read more about thawing your baby’s milk, have a read through: How to thaw breast milk?
Practicality of Breast Milk Storage Systems
Some brands have developed the full package, as they provide an adaptor (sometimes sold separately or with the bags) so you can attach the breast milk storage bag to your breast pump and express milk directly into the bag. There are also adaptors to attach the bag to the teat or nipple of the same brand baby bottle. That means you can feed your baby straight from the breast milk storage bag, with no need of using a bottle, saving you a lot of time in preparing milk, cleaning and sterilising. You may want to check out Kiinde Breast Milk Storage Twist Pouch review below.
Good for moms on the go
If you are on the go, this is a very practical baby gear item. A breast milk storage bag takes less room in your bag and if you need to leave your breastmilk for someone else to feed your baby, you are making it easy for everyone. Grandma or the babysitter won’t need to wash and spare the container for you to collect, as all bags are disposable (1 time only use). The benefit for you is that you won’t need to remember to collect a used milk container, take it home and sterilise it for another time.
2. Cons of Breast Milk Storage Bags
Risk of leakage
There are no 100% leak-free breast milk storage bags. Some bags are made of stronger material than others. There is obviously a higher cost to pay for stronger bags. However, breakage may occur due to mishandling or also bad batches. If you find that most bags in your pack of breast milk storage bags leak, contact the manufacturer, as there may be something wrong with the batch. Remember to always check your bag before storing milk in case there are any faults.
Risk of spilling milk
There is a risk to spill milk when pouring it in and out of the bag, so you need to be extra careful. We’ve compiled some tips on how to pour breast milk safely into your baby bottle here.
Cost
This is something you will need to factor in as breast milk storage bags are not re-usable. You may want to try different brands to make sure you are happy with the quality of the bag and the price you are paying for it. With the amount of brands and different qualities available you will be spoilt for choice. We hope that our review on best breast milk storage bags will help you make a decision.
Misleading measurements
Most breast milk storage bags come with a measurement line, however, it is not 100% reliable. Always check the amount of breast milk you are giving your baby. It is also best to store breast milk in small quantities and if they are in the refrigerator you can warm up several bags at a time.
3. Brand Reviews: Top & Best breast milk storage bags reviews
As a new mom myself I understand the stress of having a new baby. There is just too much going on, baby, family, sleep deprivation and you are facing new challenges every day. This guide will hopefully help you in a little way.
Breast milk storage bags are a little thing in the overall scheme of things, but they can have a huge impact in terms of saving valuable time for resting. After all, we all need something to make our lives a little bit easier.
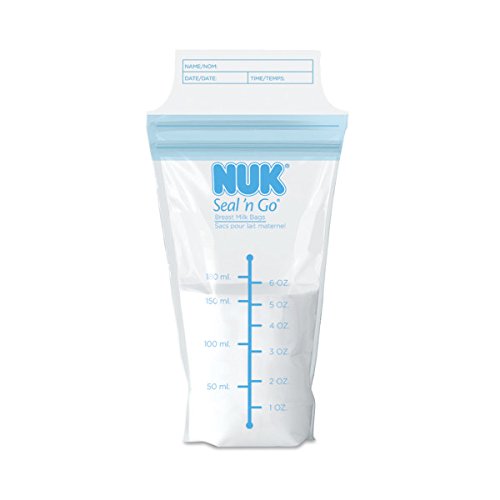
Nuk Seal ‘N Go Breast Milk Storage Bags
Features:
[one_half_first]- BPA-Free and pre-sterilised
– Up to 6oz (approx. 177ml)
– Freezer safe, including improved oxygen barrier
– Self-standing bottom
Pros: – Strong material
– Double zip lock system Cons: – Measurement lines not too accurate, but better than other bags
– Breakage has occurred but less than with other brands[/one_half_first][one_half_last][thrive_link color=’blue’ link=’https://www.roamingmommy.com/6i3x’ target=’_blank’ size=’medium’ align=’aligncenter’]Check Out on Amazon.com[/thrive_link][/one_half_last]
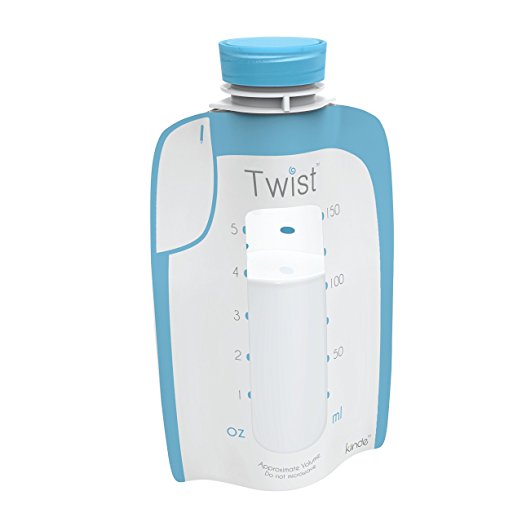
Kiinde Breast Milk storage Twist Pouch
Features: – Up to 6 oz (approx. 177ml)
– Tough material
– Leak-proof screw cap
– Pouches twist and lock onto pumps from most major manufacturers (using adapter which is sold separately)
– System combines with Kiinde twist active latch nipple to feed your baby from the bag
Pros: [one_half_first]- Tough material
– Screw caps are safer than zip lock systems
– Option to pump into bag if adapter is used
– Option to feed baby if same brand nipple or adapter is used Cons – May take more freezer space because of twist cap
– Can’t freeze flat
– More expensive than other solutions
– Measurement lines may be inaccurate, but better than other brands[/one_half_first][one_half_last][thrive_link color=’blue’ link=’https://www.roamingmommy.com/i4k7′ target=’_blank’ size=’medium’ align=’aligncenter’]Check Out on Amazon.com[/thrive_link][/one_half_last]
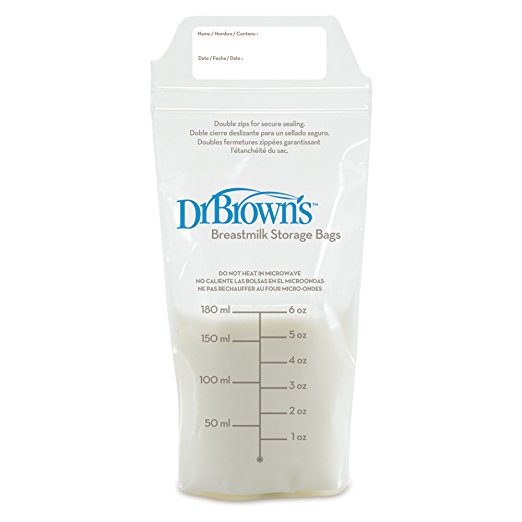
Dr Brown’s Breast Milk Storage Bags
[one_half_first]
Features
-Pre-sterilised and BPA-free
-Extra thick design with double zip
-Bags stand up right for easy handling
Pros – Good thick material
– Easy to pour milk in and out
– Can lay down flat and upright
Cons – May be more expensive than other options
– Measurement lines not too accurate, but better than other bags[/one_half_first][one_half_last][thrive_link color=’blue’ link=’https://www.roamingmommy.com/z254′ target=’_blank’ size=’medium’ align=’aligncenter’]Check Out on Amazon.com[/thrive_link][/one_half_last]
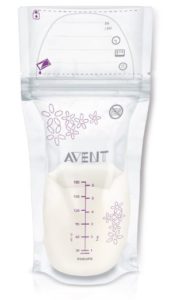
Philips AVENT Breast Milk Storage Bags
[one_half_first]Features:
– BPA free and pre-sterilised
– Holds up to 6oz (177ml)
– Strong and durable: reinforced seams and dual layer bag
– Double zipper
– Self-standing
– Wide opening for easy filling and pouring
Pros: – Easy to open and close
– Big label to write on Cons:
– Thinner material than other brands, according to some users
– Measurement lines not too accurate
– There have been cases of leakage, according to some users[/one_half_first][one_half_last][thrive_link color=’blue’ link=’https://www.roamingmommy.com/4idx’ target=’_blank’ size=’medium’ align=’aligncenter’]Check Out on Amazon.com[/thrive_link][/one_half_last]
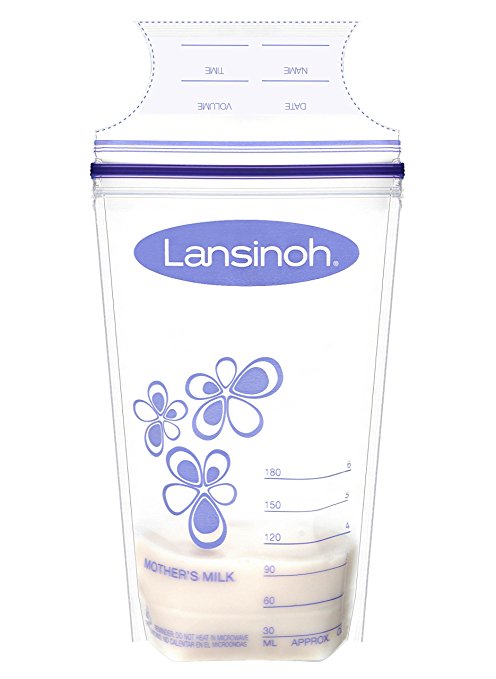
Lansinoh Breast Milk Storage Bags
[one_half_first]
Features:
-BPA-Free
-Recently re-designed with stronger material
-Ideal for storing & freezing breast milk
-Patented double Click ‘n’ Secure double seal
-Large size 6oz (177ml) capacity
-Convenient pour spout
Pros:
– 6oz capacity (177ml)
– Easy open system
– Double seal
– Easy to stack as they lay flat
– Wide edges- bags seem thicker Cons:
– Hard to open / close
– There have been cases of leakage, according to customer reviews
– Measurement lines may be inaccurate[/one_half_first][one_half_last][thrive_link color=’blue’ link=’https://www.roamingmommy.com/dj99′ target=’_blank’ size=’medium’ align=’aligncenter’]Check Out on Amazon.com[/thrive_link][/one_half_last]
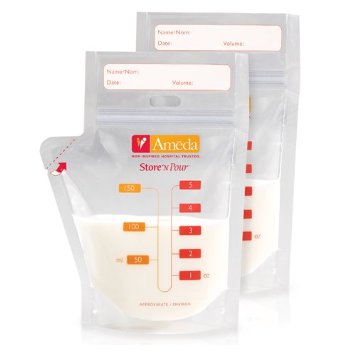
Ameda Store N Pour Breast Milk Storage Bags
[one_half_first]
Features:
– Pre-sterilised and BPA-Free
– Strong design to prevent spilling or cracking
– Pump straight into the bag using adapters or transfer from bottles
– Unique spout helps prevent spills
– Freezer safe
Pros:
– Holds up to 5oz (148ml)
– Good design for safe pouring
Cons: – Measurement lines may be inaccurate
– Less capacity than other brands
– No double zip lock[/one_half_first][one_half_last][thrive_link color=’blue’ link=’https://www.roamingmommy.com/1e9m’ target=’_blank’ size=’medium’ align=’aligncenter’]Check Out on Amazon.com[/thrive_link][/one_half_last]
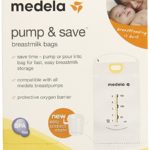
MEDELA Pump and Save Breast Milk Storage Bags
[one_half_first]
Features: – BPA-Free and pre-sterilised
– Up to 5oz capacity (148ml)
– Compatible with Medela breast pumps
– Protective oxygen barrier to preserve breast milk nutrients
– Comes with adaptor
Pros:
– They can stand up right
– Easy to use with Medela pump
– Durable material
– Great option for working moms for expressing milk at work[/one_half_first][one_half_last][thrive_link color=’blue’ link=’https://www.roamingmommy.com/bdmp’ target=’_blank’ size=’medium’ align=’aligncenter’]Check Out on Amazon.com[/thrive_link][/one_half_last]
Cons: – Too small capacity
– Difficult to handle if you don’t have a Medela breast pump
– There have been cases of leakage, according to customer reviews
– Hard to open/ close zip
– Measurements may be inaccurate, according to customer reviews BUT, check out this video from Amanda Tedder showing a technique to get an accurate measurement reading
[video_page_section type=”youtube” position=”default” color=”#57a7b3″ btn=”light” heading=”Medal Pump and Save Breast Milk Storage Bags” subheading=”Instructions to read measurements properly” cta=”” video_width=”1080″ hide_related=”true” hide_logo=”true” hide_controls=”false” hide_title=”false” hide_fullscreen=”false”]https://www.youtube.com/watch?v=DV72rYjvZ34&t=110s[/video_page_section]
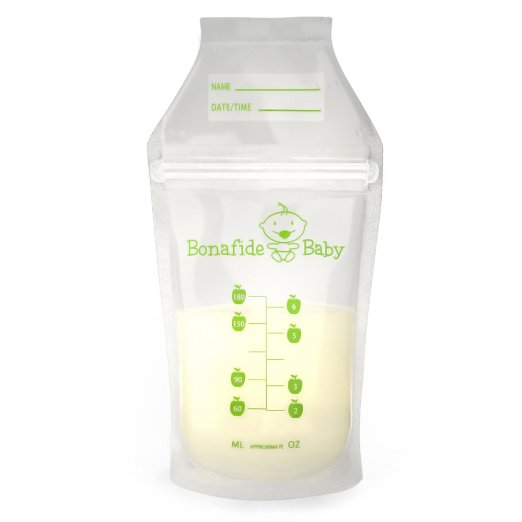
Bonafide Breast Milk Storage Bags
[one_half_first]Features: – BPA/ BPS Free
– Double zip seal
– Include a free non-toxic marker for labelling
– Tear off top
Pros: – Thick resistant material
– Good leak proof
– More affordable than other brands Cons: – Smaller than other bags
– Measurement lines are inaccurate[/one_half_first][one_half_last][thrive_link color=’blue’ link=’https://www.roamingmommy.com/notv’ target=’_blank’ size=’medium’ align=’aligncenter’]Check Out on Amazon.com[/thrive_link][/one_half_last]
4. Tips to reduce risk of spilling milk when pouring it in or out of the bag
If you are new to the breast milk storage bag systems you may want to take a few precautions to reduce the risk of accidentally spilling your milk when pouring in and out of the bag:
1. Always wash your hands first
2. Label the bag before opening it. We recommend you use a thick marker instead of a pen as it makes it easier to write on plastic
3. Open the bag and place it over a sterilised container
4. Carefully pour the milk into the bag. We recommend you don’t pour too much in one single bag. It is always recommended to store breast milk in small portions of approx. 2-3 oz (60-90 ml) or as much as your baby feeds.
5. Any spillage will fall into the sterilised container and can then be poured back into the bag
6. You can place a sterilised container under baby bottle if you feel there is a risk to spill milk when pouring out of the bag.
5. How long does breast milk last in at room temperature, in the refrigerator and freezer?
This charts contains information from the Centers for Disease Control and Prevention (CDC)
Where?
Temperature
How long?
Tips
Outside of refrigerator
Room temperature 77°F or 25°C
6-8 hours
Keep container covered
Insulated cooler bag
5-39°F or -15-4°C
24 hours
Keep coolers in contact with the breast milk and avoid opening the bag
Fridge or refrigerator
39°F or 4°C
5 days
Store milk at the back of the main body of appliance
Freezer
-4°F or -20°C
6-12 months
Store milk at the back section of the freezer
6.Preparing for storing your baby’s milk
1. Always wash your hands first
2. Use a breast milk storage bag or a sterilised and reliable container that can be sealed
3. Label the container with the amount of milk and date expressed
4. Do not mix fresh milk with already frozen milk as they are different batches
5. If you gave your baby milk from the bottle and there is some left, do not save it for later. Breast milk cannot be re-used.
7. How to store your breast milk?
Once you are ready to store your milk remember to organise your refrigerator to make it easier for you to find the oldest milk first and leave the newest one at the back for later use. There are some accessories available to help organise your refrigerator / freezer.
8. Recommendations for freezing breast milk
– Liquids expand when frozen, so avoid fully filling your breast milk storage bag to prevent it from bursting and leaking
– Always store your breast milk at the back of the freezer, where it gets a constant flow of cold temperatures
– Depending on your storage container system you may prefer to stack the containers one on top of the other or leave them free-standing
– Save your newest milk at the back so that you can efficiently manage your inventory and find milk easier
9. How to thaw breast milk?
Whenever possible, thaw your frozen breast milk by moving it to the refrigerator. Frozen milk can last in the refrigerator from 12 to 24 hours.
Alternatively you can place the frozen storage bag in a bowl with warm water and wait for a few minutes until your milk is at room temperature to give to your baby. There is no need to use boiling water to thaw milk, and the milk could get extra hot.
Once milk is thawed, it should be used within 24 hours and cannot be re-frozen.
10. Where to buy breast milk storage bags?
All brands reviewed in this feature and many more can be found on Amazon.com. Just click on the links above for your convenience. We are Amazon Associates so we will get a commission at no extra cost to you.
Breast milk bags are available also at major retailers such as Walmart and Target. You will also find them at your local pharmacy or chemist. Note that brands available and prices may vary from store to store.
We hope you found this article useful and that we covered all you needed to know about the breast milk storage bags topic. Please leave a comment below and also let us know if you would like to read about another mommy / baby related topic at RoamingMommy.com.
This is the 3rd in a series of 3 guides on best bottles for breastfed babies. In this guide we will go through the best bottles for breastfed babies. If you are in a hurry, you can skip through this intro and go straight to our comparative table. Has your baby latched onto the bottle … Read more
This is the 2nd part of our 3 guide series on best baby bottles for breastfed babies. If you are trying to introduce your baby to the bottle, you may want to check out part 1: 9 Tips to introduce your breastfed baby to the bottle. That article includes some advice on how to transition from breast to bottle and help your baby accept the bottle if she happens to refuse it.
In the third article of the series we will recommend what are the best bottles for breastfed babies by brand.
What makes the best bottle for breastfed babies?
There are so many baby bottle shapes, nipples and brands out there that it can seem a bit overwhelming for a new mom to choose the best bottle for a breastfed baby. In this guide our aim is to make it as easy as possible for you to compare the different options available and decide what the best breastfeeding bottle is for you.
Baby Bottle Nipple
Baby bottle nipples have different shapes but also different flows. As your baby grows she will need a faster flow nipple to draw milk. Newborns always start with a slow flow nipple. Always check the label before buying a bottle as it will feature a guide on the recommended nipple flow by age.
Depending on when you decide to start offering the bottle to your baby, you will need to pick the appropriate baby bottle nipple size. There are nipples for newborns, 1-3 months old, 3-6 months old, 6-12 months old. This can also vary according to the bottle brand.
Anti-colic bottle features
Nowadays most baby bottle brands come with an integrated colic-free system. It consists of a feature integrated to the nipple to prevent your baby from swallowing air bubbles, which could cause gas or colic.
Different brands will have different valve systems to prevent colic. From what we found, there is no single anti-colic system that works for everyone.
Regardless of the colic free feature, it is always important to take a few steps to prevent gas or colic:
1. Vent your baby at least once throughout and after the bottle feed to help release any air bubbles she may have swallowed
2. Feed your baby in an up-right or semi up-right position
3. Make sure that milk covers the nipple at all times to prevent your baby from swallowing air
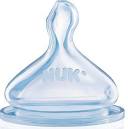
What is the best bottle nipple for breastfed babies?
Baby Bottle Material
There are silicone and latex nipples, and it all depends on what “best” means to you. Latex is more soft and flexible than silicone but it is not as durable.
Some babies prefer one material over the other, so one option to optimise your bottle search is to buy 1 bottle brand with the 2 different nipple materials, if they are available for that brand.
Eg. Latex Nipple Eg. Silicone Nipple
Bottle Nipple Shape
The nipple shape is another variable to consider when testing bottles for transitioning from breast to bottle. All bottles want to mimic breastfeeding and offer different designs that should help your baby.
Pay attention to how your baby reacts to the different baby bottle nipples. That will be the best guide on your search. Remember to be patient and try a variety of nipple shapes.
Bottle Nipple Sizes
There are many bottle sizes available to suit young and older babies. Bottles for newborns are the smallest of the range and the size may vary depending on the brand. Some go from 4oz/ 125ml to 9oz/260ml for older babies. It is recommendable to start with the smallest size if you are feeding a newborn.
Deciding what the best bottle for a breastfed baby is
It is important to look at the bottle material and the nipple. Both are important as the nipple will be in contact with your baby’s mouth, whereas the bottle will be in contact with your milk. Some moms prefer glass baby bottles and some others prefer BPA plastic, silicone or stainless steel ones. There are advantages and disadvantages to each and we have summarised them below:
Glass Baby Bottles
If you are concerned about your baby being in contact with the chemicals found in plastics, then a glass baby bottle may be a good option for you. These bottles have been around for decades and many moms choose these over plastic ones.
The drawback is that glass breaks from time to time, so make sure you thoroughly check your bottle before feeding your baby. Glass baby bottles should be disposed of as soon as they chip or break. Some companies have started selling glass baby bottles with a silicone sleeve for protection. Glass bottles may also be heavy for little hands to hold.
BPA-Free Plastic Baby Bottles
Plastic baby bottles are safe to use because they are made of food-grade plastic. In 2012 the FDA banned any baby bottles or sippy cups made of BPA material. Hence, if you choose to go with a plastic bottle, at least in the USA you can be sure you will get a BPA-free one.
There are different opinions around plastic bottles used for babies, but undoubtedly they are the most affordable and popular ones.
BPA-free baby bottles are durable and resistant, however, you should dispose of them if they look worn out.
Stainless Steel Baby Bottles
These bottles are also a great option for parents wanting to avoid plastic bottles. Some versions may be insulated, which means that they can keep the liquid inside warm or cold, such as a thermos would do.
Unlike glass, there is less risk of breakage, so they last longer. They are also environmentally friendly as they are fully recyclable.
An obvious point that is worth mentioning if you are considering these bottles is that measuring milk may be more difficult, as they are not transparent like other materials. It may also be more difficult to know if your baby has finished her bottle, unless you grab it and either feel it lighter or open it to check the remaining of milk.
Stainless steel may sweat (if it is not insulated), so consider getting a baby bottle with a latex cover, so that it is not slippery for tiny hands.
Silicone Baby Bottles
Silicone baby bottles are relatively new compared to other types of bottles. These bottles are soft to grab and they mimic a breast. Both the body of the bottle and the nipple are made of silicone.
Silicone bottles are easy to clean (only use soapy water), durable and resistant. They are also light weight and soft to touch, ideal for baby to grab them.
If you have tried other materials and your baby rejects them, you may want to give these bottles a go. Comotomo baby bottles claim that 80% of babies transitioning from breast to bottle that had bottle rejection issues, took the Comotomo bottle.
How many baby bottles will you need?
First things first, start by trying a few different baby bottle brands and nipple shapes. Once you are certain of which bottle and nipple your baby prefers, you can decide how many to get.
The more bottles you have the less time you will spend cleaning and sterilizing baby bottles, nipples and other accessories.
To make the decision it is important to consider how many times you bottle feed your baby in a day. This may vary from family to family and it is entirely up to you. In my personal case, my baby started off with one bottle feed a day and the rest of the time I was breastfeeding. When she grew older and transitioned to cow’s milk she had 3 bottle feeds a day. Hence, we never needed more than 2 baby bottles.
Some parents who bottle feed their newborns from the start may choose to have 9 to 12 baby bottles sterilized and ready to go every day. Again, this is a very personal decision so think about what would work best for you and your family.
Key take outs
Bottle materials: glass, plastic, silicone or stainless steel? All materials have pros and cons. The best way we can recommend you make a decision is to prioritize what is most important for you. If you are still not decided, give your favorite materials a try.
Nipple: shapes and flows differ from brand to brand. If your baby is not latching easily to the bottle, the best you can do is test a few different options of nipple shapes. Regarding nipple flow you may need to be a bit more careful in selecting the nipple according to your baby’s age.
Remember to be as observant as you possibly can. That way you may be able to pick up any signals your baby gives you to guide your bottle search. If baby continues to reject a bottle, just try another one and try to be persistent. If you need more tips, check them out here: 9 Tips to introduce your breastfed baby to the bottle
Are you ready to move on? Next step is brand reviews and recommendations. Click here to go to our brand review on best baby bottles for breastfed babies.
Was this article useful? Please leave us a comment!
In this first part of the series we provide some advice on how and when to introduce your breastfeed baby to the bottle.
Have you established breastfeeding with your newborn and feel you should be considering introducing the bottle? If that’s the case, you are not alone. Many moms are on the same boat when it comes to introducing your breastfed baby to the bottle.
What are the advantages of introducing your breastfed newborn to the bottle?
To have a well-deserved break
We all feel that way, so you are not alone. From time to time would like to get out of the house for a short walk; especially during the first few weeks and if it is difficult to establish lactation.
To separate from your baby for short periods of time
You may need to attend a doctor’s appointment or maybe you’d like to have a quiet diner with your partner while someone else is minding your baby.
It is also a good idea to be ready for any emergencies. If you need to attend any urgent matters and unexpectedly separate from your baby, it will be easier if you know it latches to a bottle.
To separate from your baby for longer periods
This may be your case if you are planning to go back to work soon, so it is understandable you may want to start offering the bottle to your baby.
When is a good time to start introducing your breastfed baby to the bottle?
Most lactation consultants recommend introducing the bottle or pacifier after lactation has been properly established.
Every case is different, so it will depend on how you and your baby are tracking. Some babies are born “knowing” exactly how to latch properly to the breast from day one. Others take a bit longer to establish lactation. Generally speaking the estimated time you could start trying offering the bottle is at around 4 to 6 weeks from birth.
It is important to take into consideration that during the first few weeks after your baby is born you need to generate a milk supply. Hence, you will need your baby to stimulate your breasts to build the supply he needs. If you replace a feed with a bottle you will probably need to express milk. If you don’t it could lead to excessive breast engorgement or even mastitis.
We would also like to highlight that if you introduce the bottle too early you could risk your baby preferring the bottle over the breast. Drawing milk from a bottle is much easier than breastfeeding and your newborn may decide that he prefers the easy way. Take your time and introduce the bottle gradually.
9 Tips to introduce your breastfed baby to the bottle
This is a really tricky point because some babies accept the first bottle they are offered, whereas some others are exactly the opposite. The later group may need to try every baby bottle in the market until they find the one that is right for them. You may want to check out our list on Best Bottles for Breastfed babies for some advice on how to get started.
2. Get help from Dad (or Grandma)
In some cases it is easier for baby to accept the bottle if you are not around. After all, you are Mom and “The Supplier” of the real thing. Take that well-deserved break and get out of the house while the team experiment bottles with baby. However, don’t go too far just in case your baby goes too hungry and the bottle feeding session is unsuccessful.
3. Calculate the right timing
Wait until next feed to introduce the bottle and don’t try between feeds. You will have better chances of your baby accepting the bottle if he is hungry, but you don’t want to get to the point he is starving as he’ll be too frustrated to cooperate.
4. Consistency
Try to introduce the bottle at the same time every day, so that your baby starts getting used to it as part of his/ her routine. Pick a time that is convenient for you, when neither of you are too tired to give it a try.
5. Be Patient
It may take time for your baby to accept the bottle, so try not to give up and keep offering the bottle a little bit every day. Try increasing the amount of time you offer the bottle every day, without going to an extreme. If you have been trying for some time and your baby is very upset it may be counterproductive to keep offering the bottle at that stage as he will be really tired, frustrated and hungry.
In my personal case, my baby accepted the bottle when she was over 3 months old. We started offering the bottle to her at 2 months but not every day. Maybe if we had been more consistent, she would have accepted it earlier… Anyway, every baby is different and you will have to go through your own journey.
6. Be observant
Try to understand why your baby is not taking the bottle. Always check your milk before you offer it to your baby: smell, aspect and temperature. If unsure, taste it to see if it has a funny flavour. Try to understand if the problem is with the nipple shape or flow.
7. Rub some milk on the bottle nipple
The bottle nipple is harder than the breast so your baby may not like the new texture. Try rubbing some breast milk into it to make it more appealing.
8. Try different positions
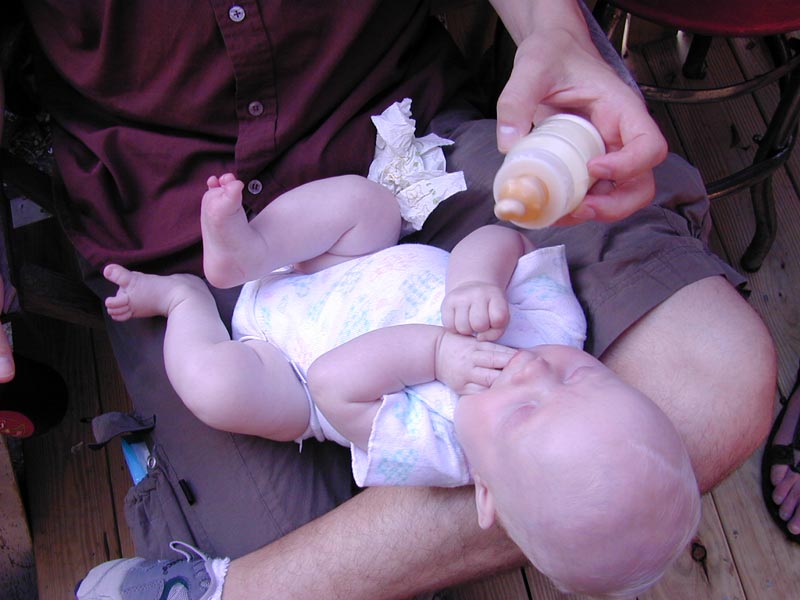
Photo by Michael Jastremski: Infant with baby bottle (CC BY-SA 2.5)
The breastfeeding position may not work for the bottle, so don’t be afraid to try different ones such as semi-upright or sitting up (this also helps colic and re flux). You may also want to try a boopy pillow.
9. Try another bottle
After trying with the same bottle for a few days, you may feel the problem is the bottle. If there is a milk overflow and you see your baby is struggling to feed it may be because you are using a fast flow nipple. It could also happen that your baby is getting frustrated because milk takes too long to come out, suggesting you may be using a slow flow nipple. As every baby is different, try all tips mentioned above with different bottles. Remember to be persistent for as long as you can.
You should talk to your physician or lactation consultant to get the best advice as to how to calculate how much milk to offer your baby.
The way that I used to calculate the amount of milk to offer my baby when she was little was based on a recommendation from her paediatrician. I would feed her 1 ounce of milk for every 2 pounds my baby weighted or 30 ml for every Kilo.
The formula above is only useful as a guide that would apply to an average weight baby. For example: A 3 month old baby weighting 11 pounds would drink 5 ounces of milk (that is 5 kilos and 150 ml). Babies that weight above or below average may need another amount of milk; and babies that have started on solids also need a different amount of milk.
Take your doctor’s advice and pay attention to the amount of milk your baby takes. You will gradually learn how to calculate how much milk to feed your baby according to her needs. If your baby is still hungry after a feed, just offer some more milk and you will gradually get the quantities right.
Was this advice helpful? Have you managed to successfully transition your baby from breast to bottle? Tell us all about it by leaving your comment below.
For more information on this topic, click here to go to part 2 of this series: How to Choose the best bottle for breastfed babies.
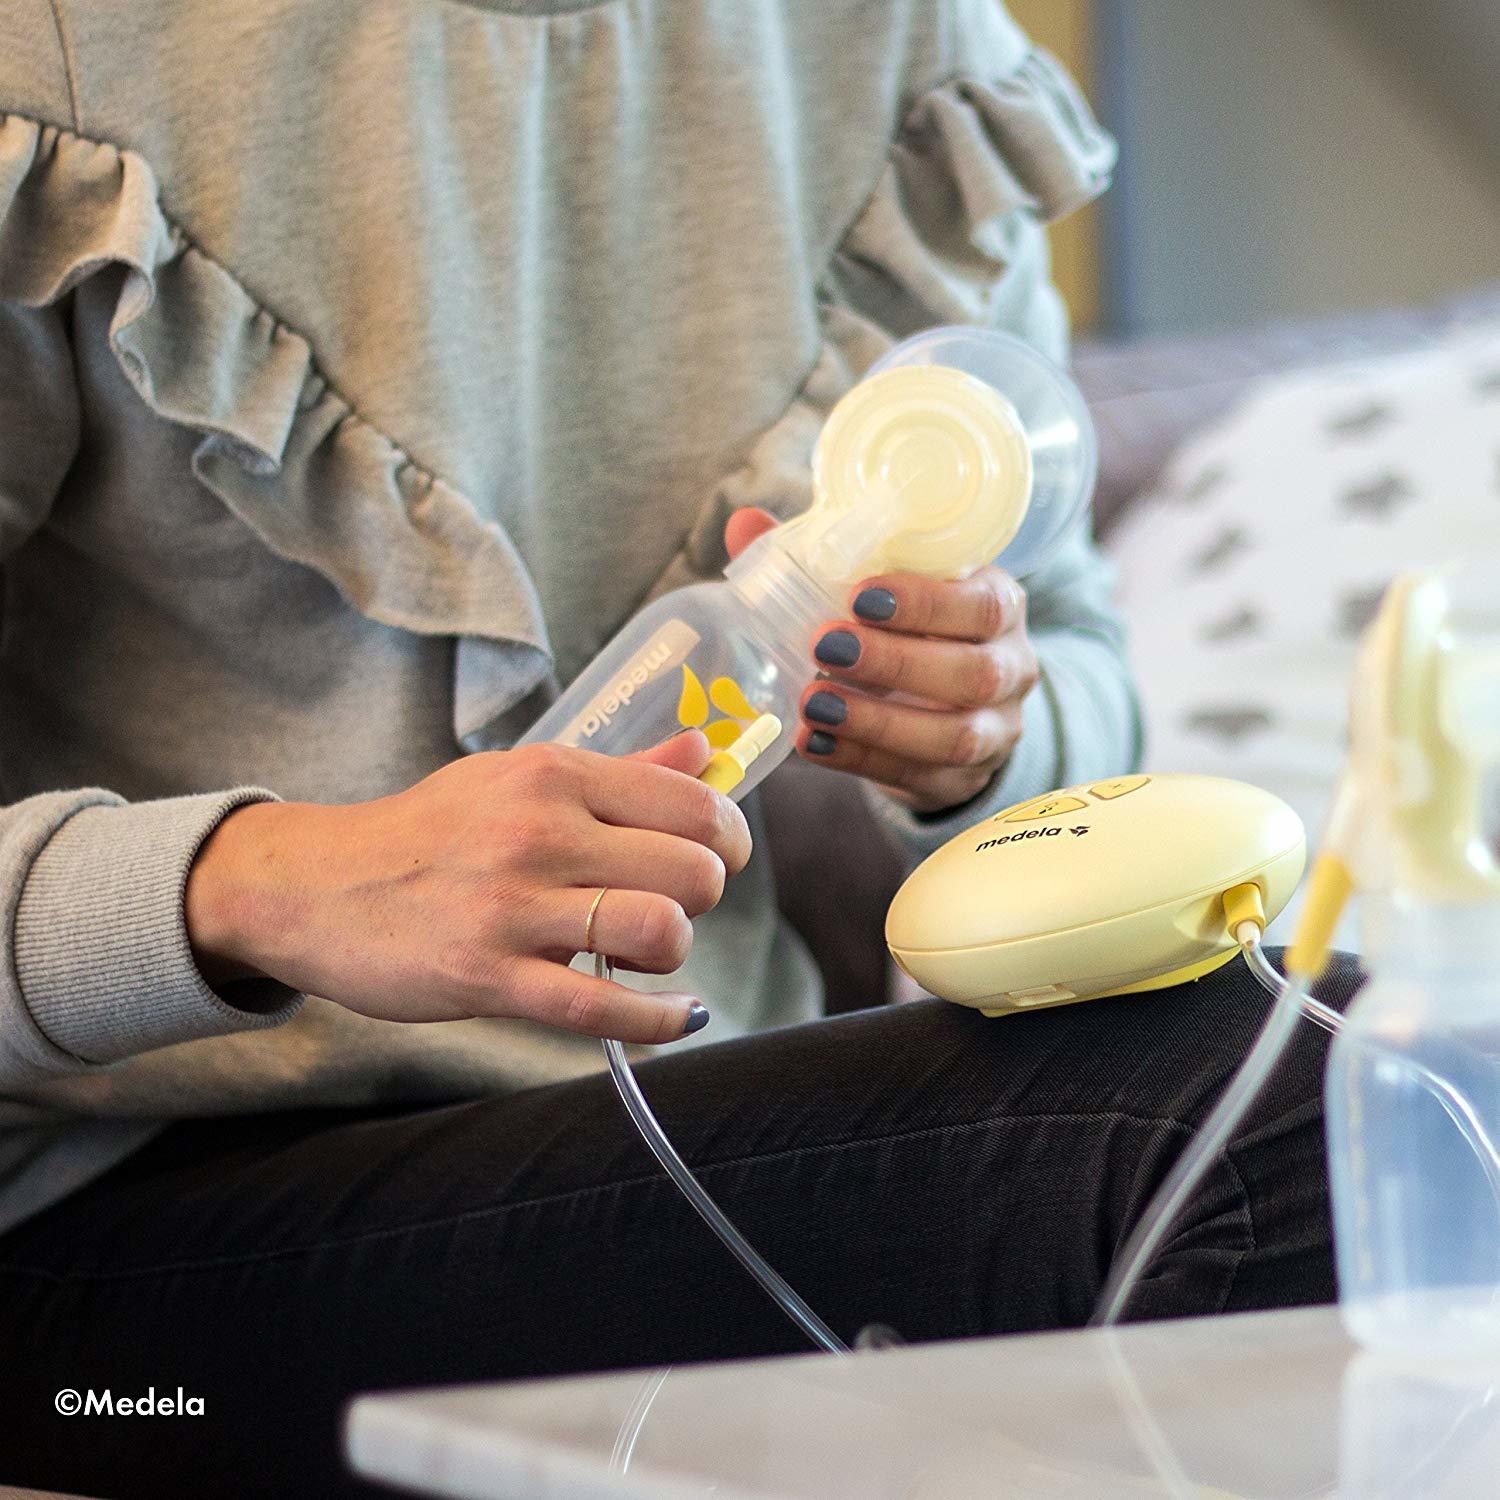
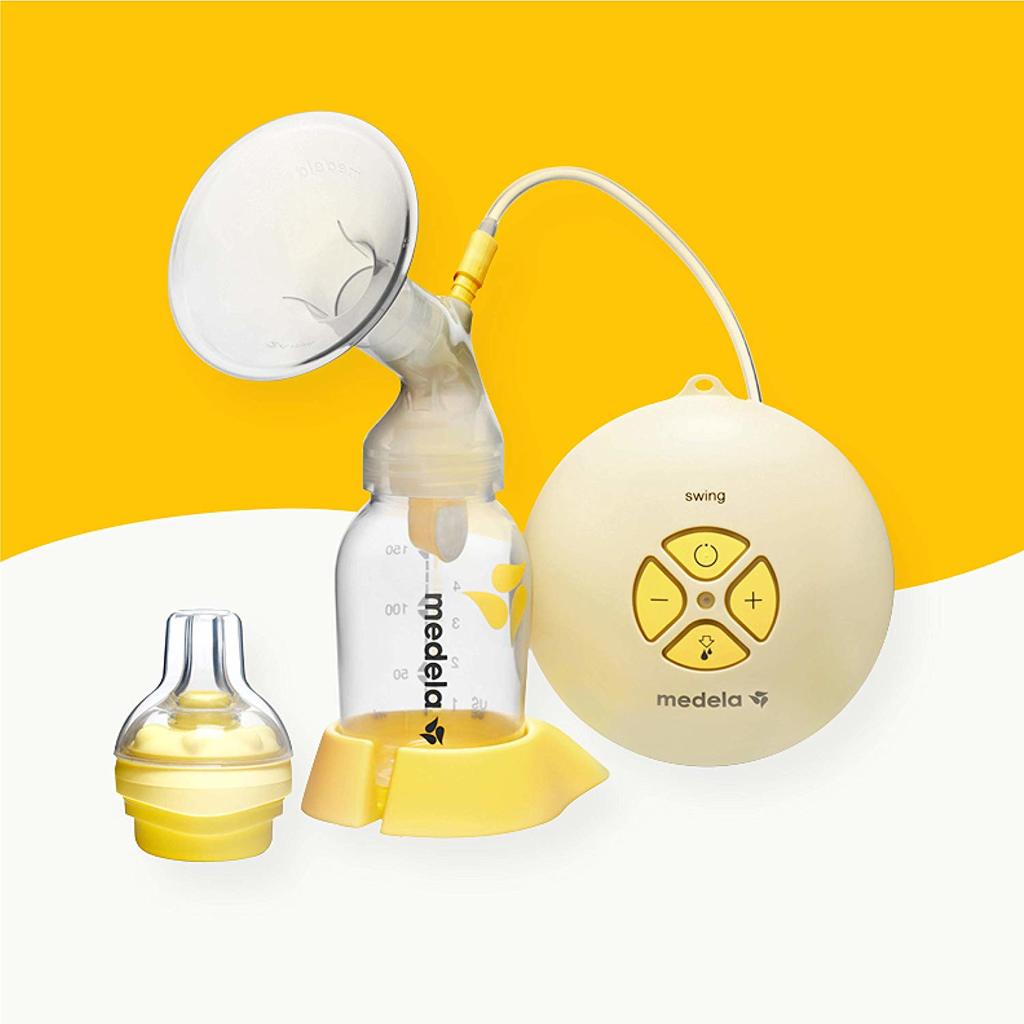
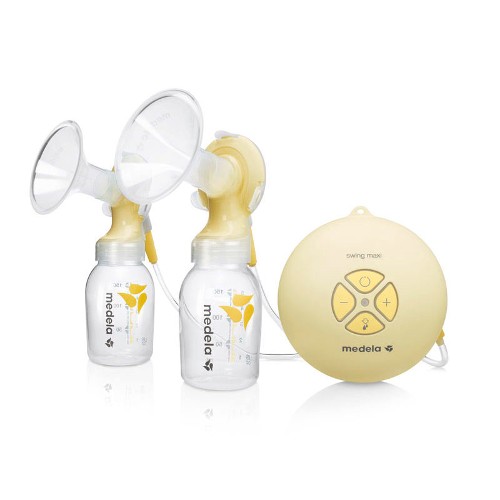
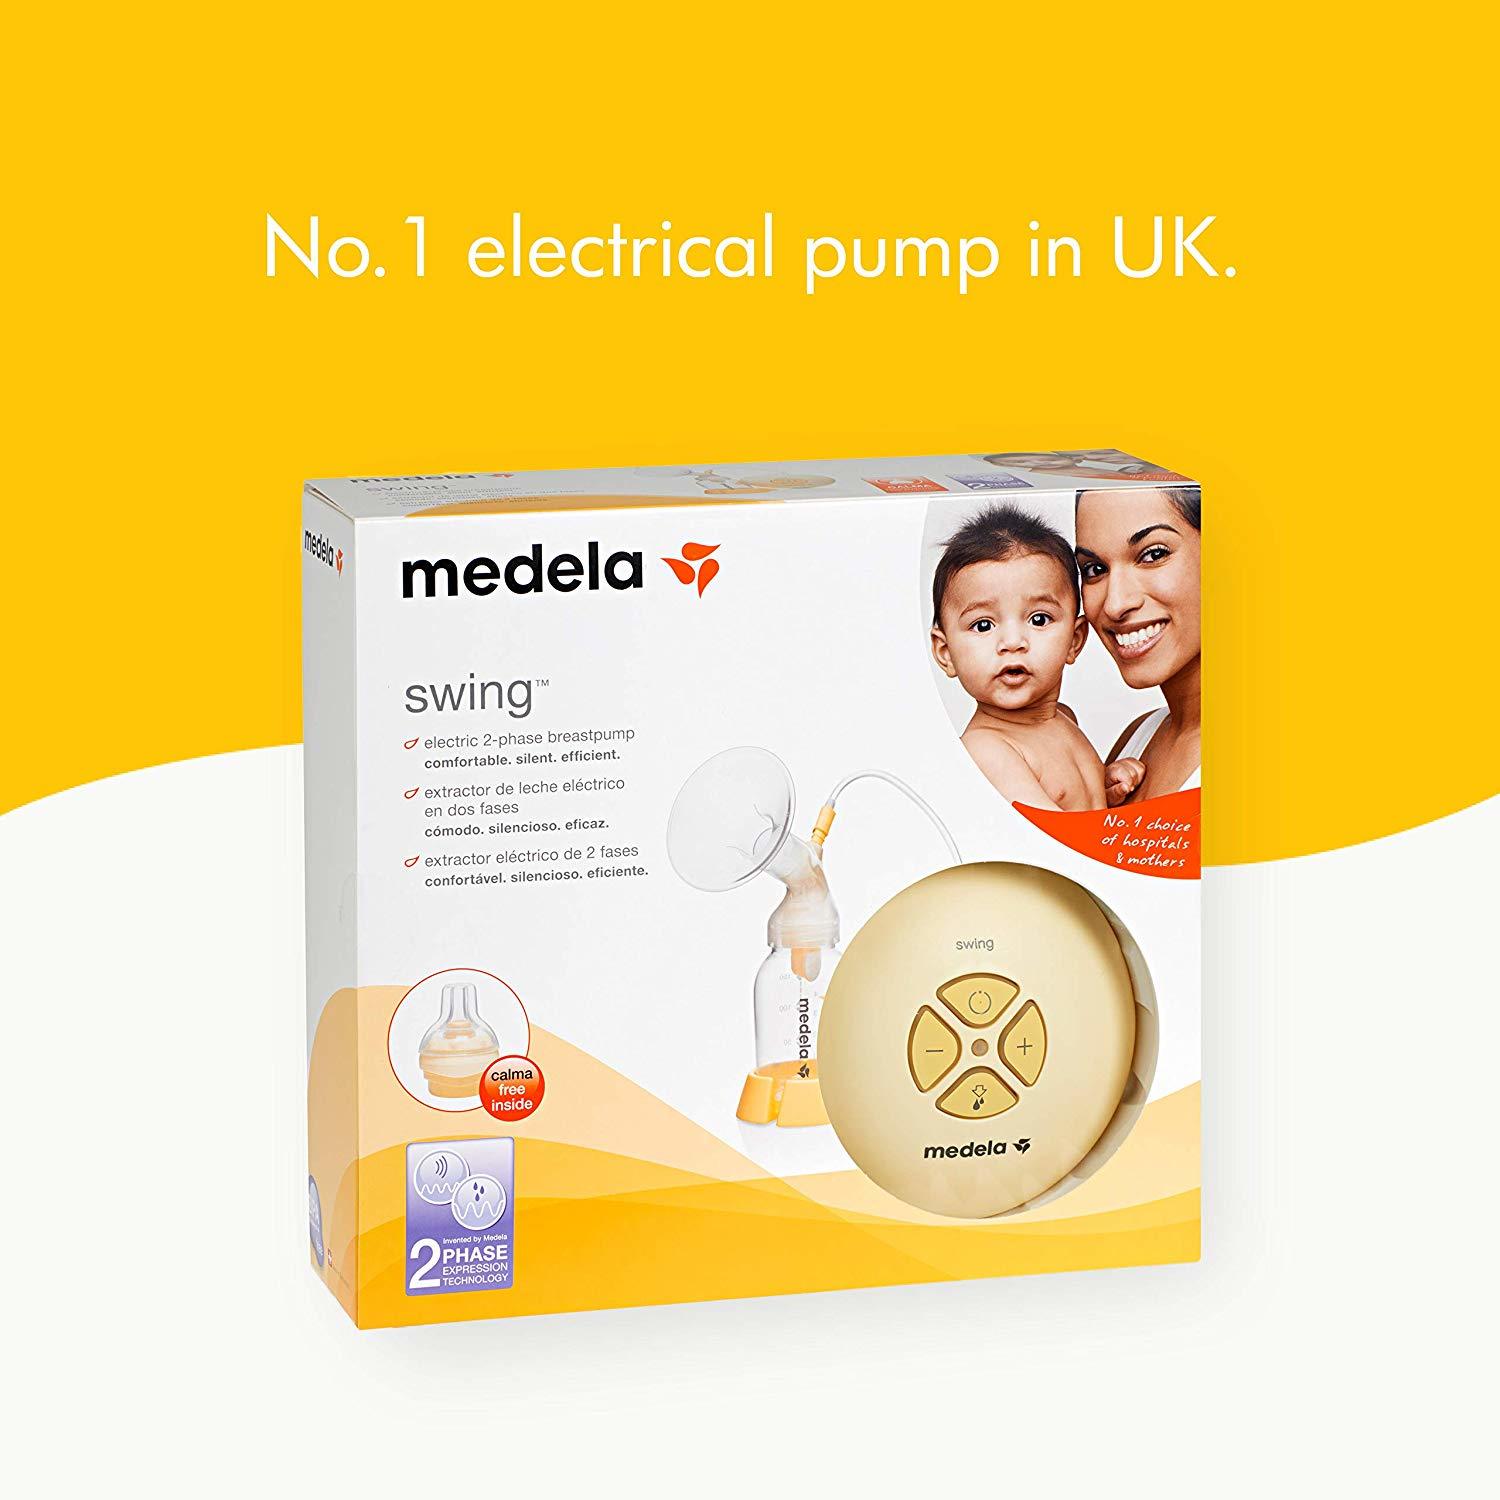
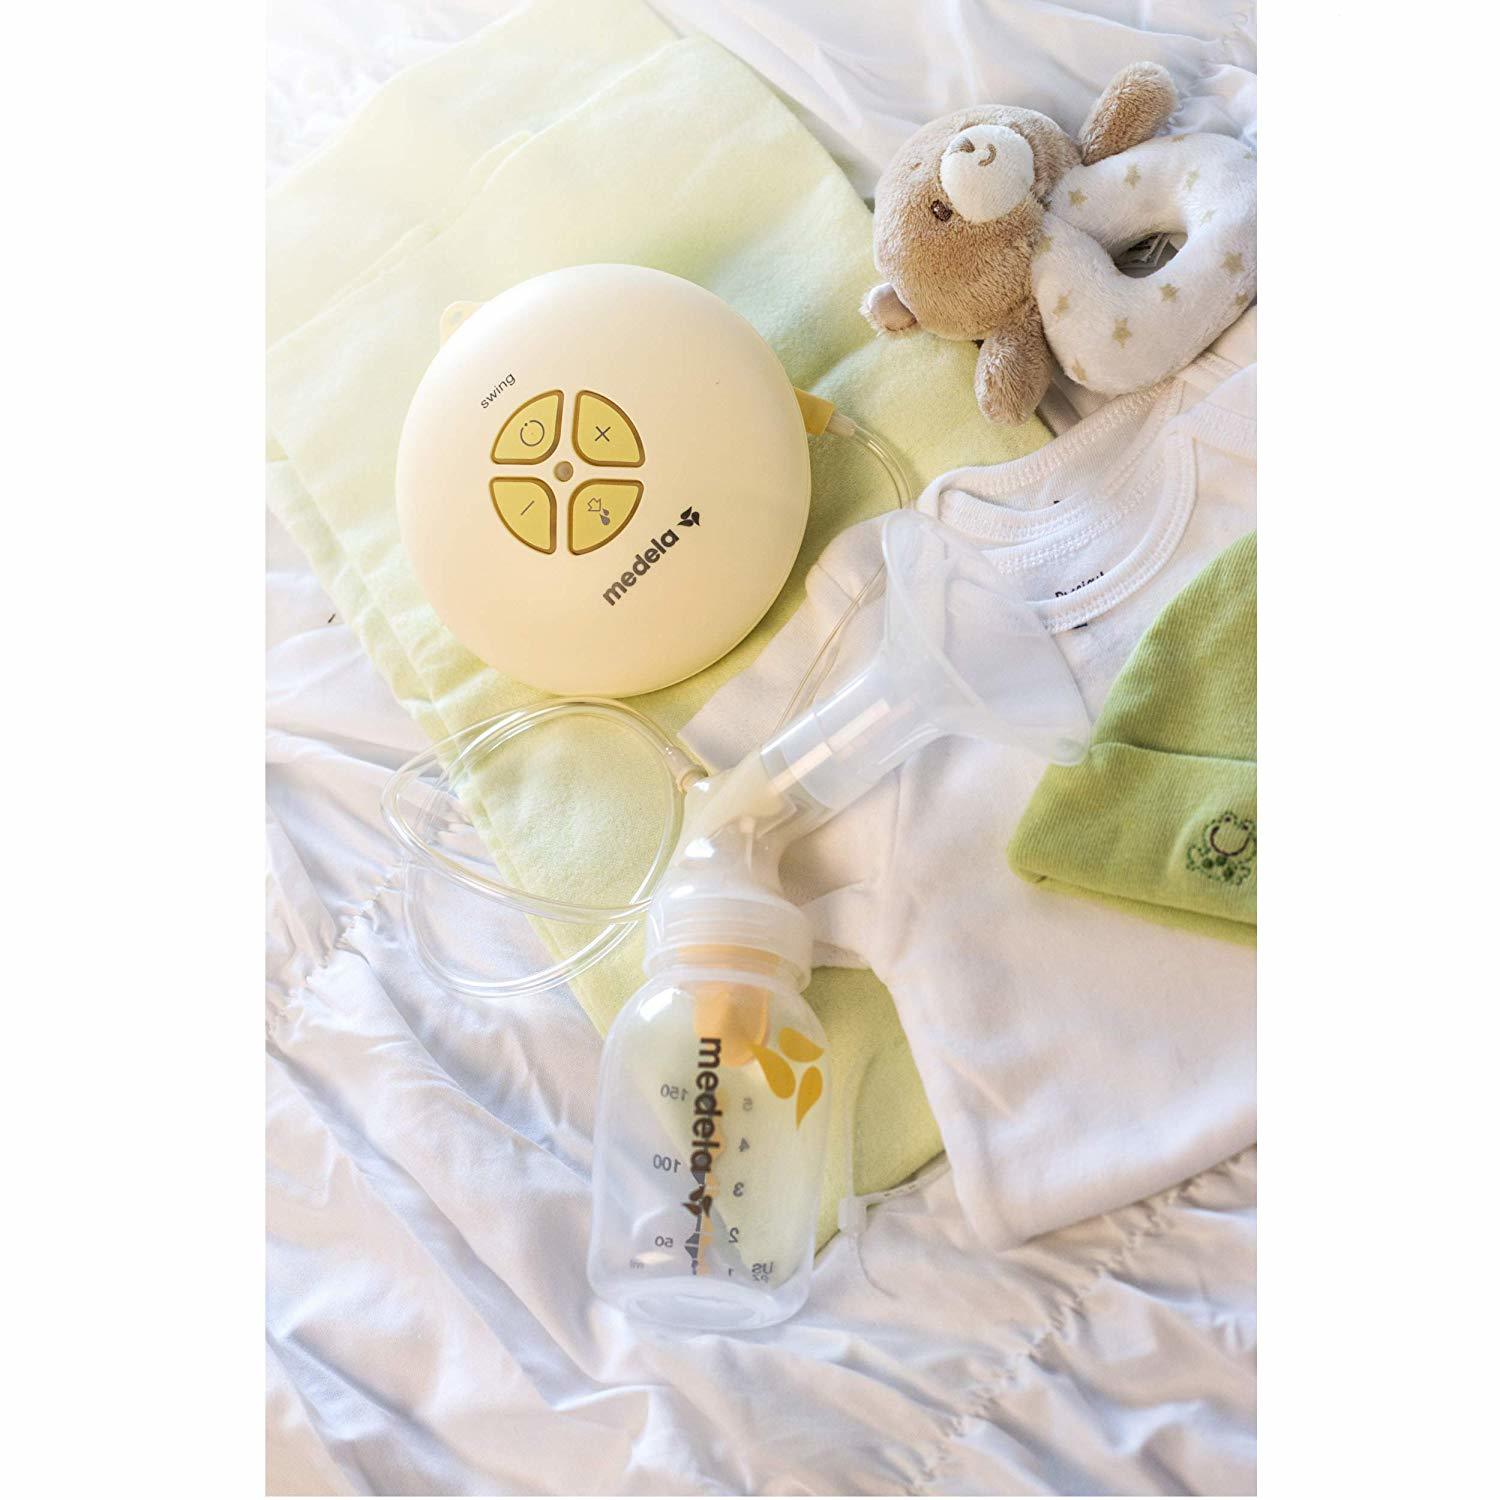
Welcome to our Medela Swing breast pump review article. If you are here, you are probably considering to buy Medela Swing breast pump.
There are different types of Medela breast pumps. The Swing model is one of the most popular ones chosen by new moms and moms-to-be.
Medela Swing Pump
There are two variants to Swing breast pumps:
Swing Single Electric Breast Pump
Swing Maxi Double Electric breast pump
If you are new to the world of breast pumps, you may want to check out our guide on How to choose the best breast pump. In that guide we explain what to look for in a breast pump and we guide you on which one you may need according to use.
Medela Swing Single Electric Pump
The Medela single electric pump has many attributes that make it an easy choice for new moms.
Quiet Breast Pump
The Swing multi-award winning design has a high end technology that promotes quiet and discrete expressing time for mom.
The benefit of having a quiet electric breast pump is that you can express milk fast and silently. This is important if you are pumping milk with your baby near by or even at work!
Portable Breast Pump
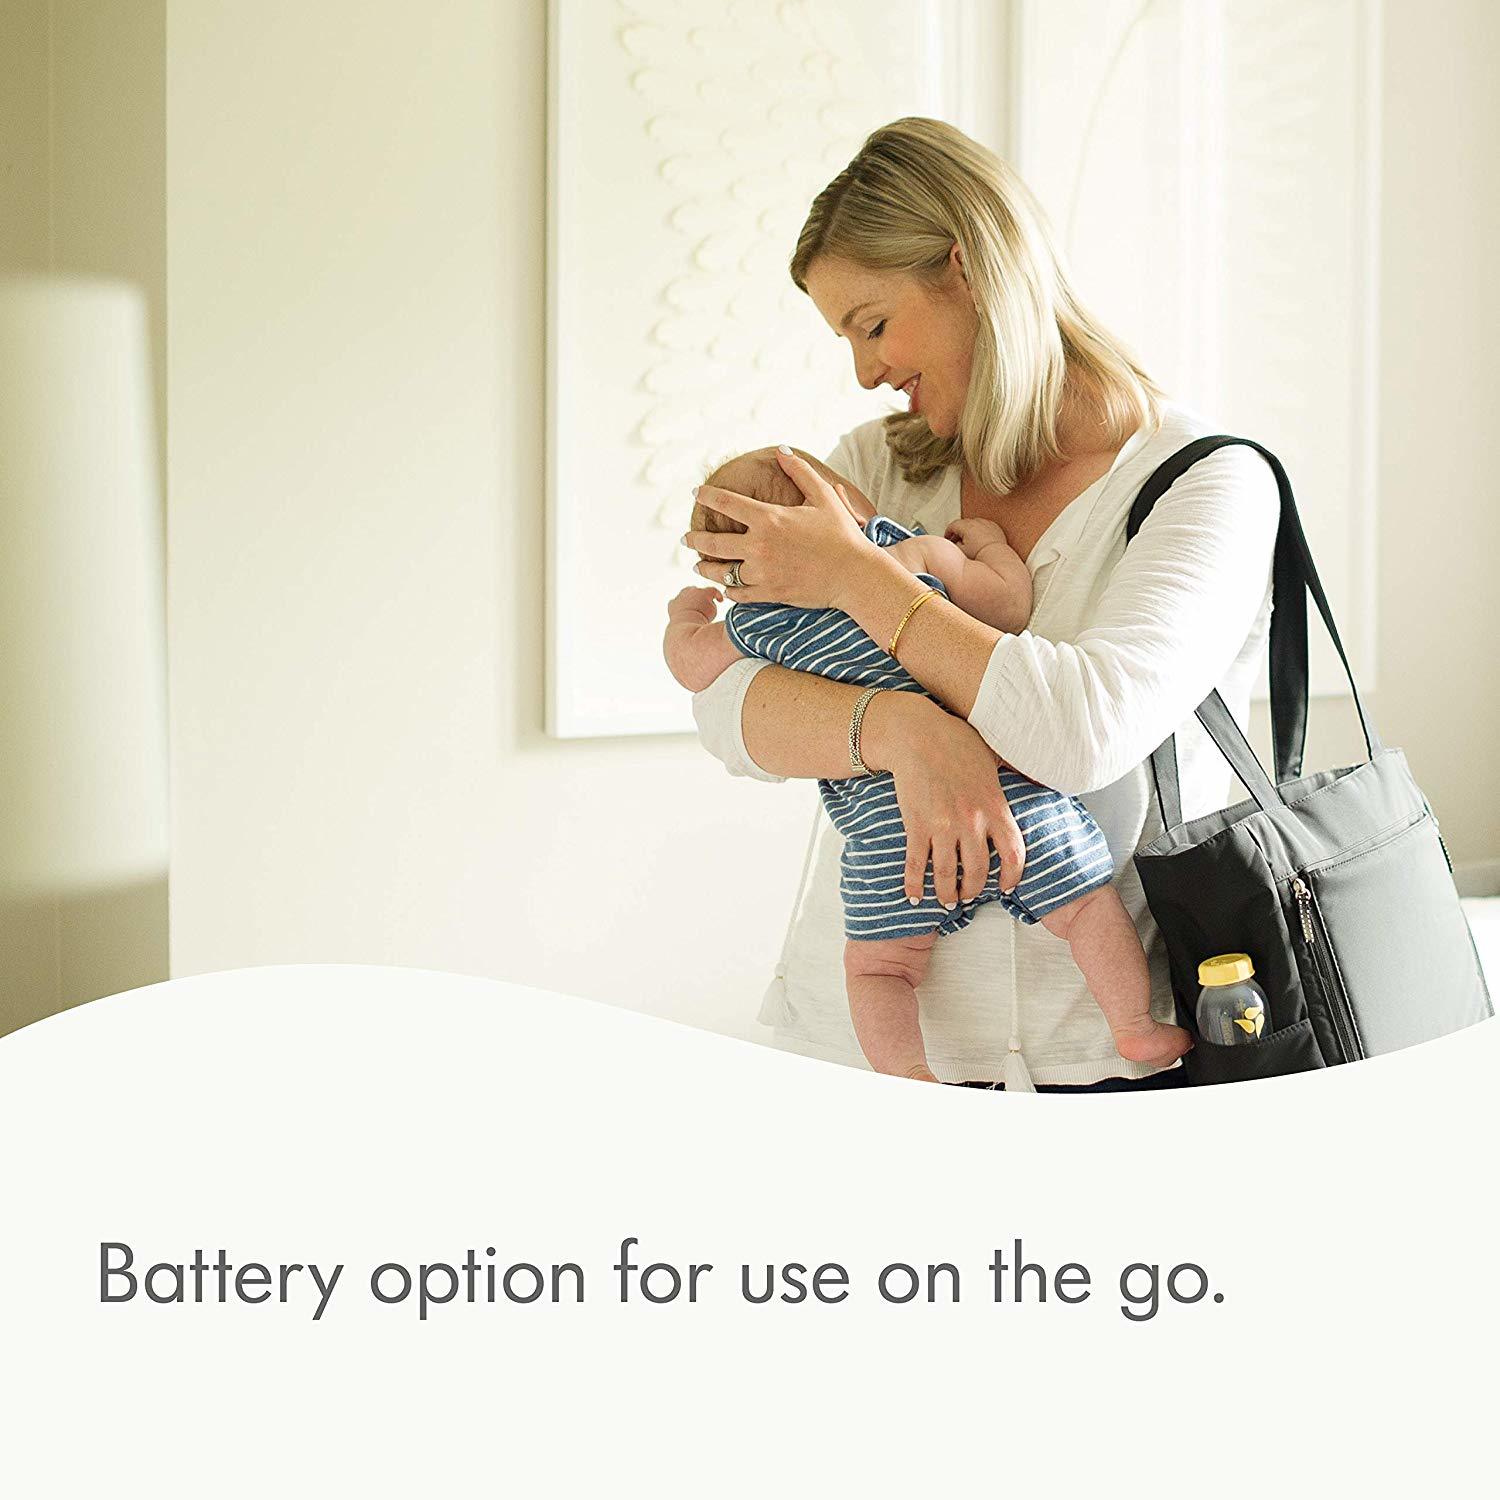
The Medela Swing Single breast pump has been designed for mothers on the go.
The design is compact and highly portable. It weighs around 2 pounds and can fit in your diaper bag or tot bag.
In fact, this is the smallest and lightest of Medela range of breast pumps.
Battery Breast Pump
Your Medela swing single electric breast pump can either powered by its AC power adapter or by using 4 lithium metal batteries.
Battery life lasts up to 1 hour, so it is great for expressing anywhere you go, even if you have to do short trips.
Medela 2 phase expression
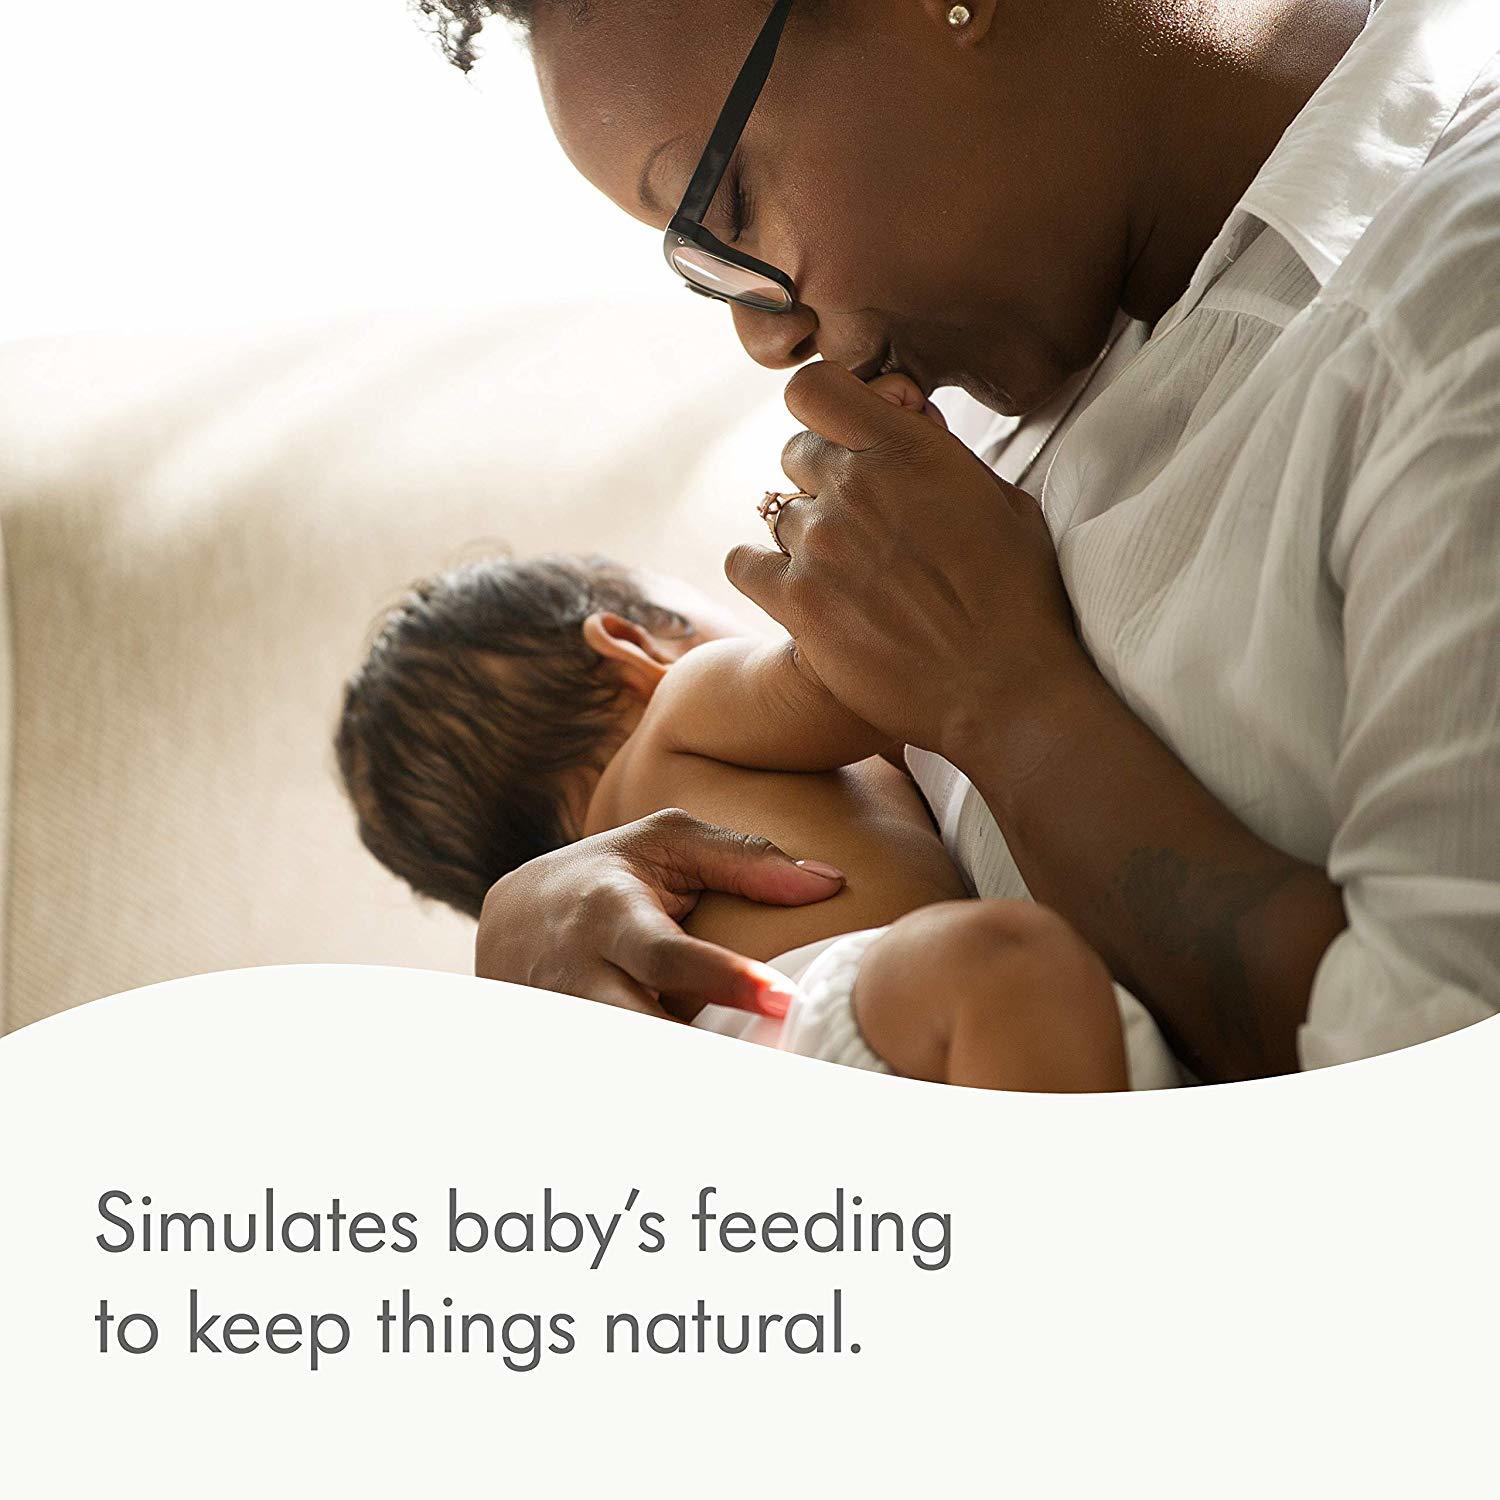
Medela has researched the sucking motion that babies do naturally and has patented its 2-phase design.
At first there is stimulation, with a short sucking motion that resembles the natural rhythm babies do. This is followed by a slower stage that gently helps milk flow.
That means you can get more milk expressed in less time.
Single electric breast pump
This variant of the Swing model allows for single breast pumping at a time.
Quality breast pump
If you buy Medela Swing, you buy also the quality of a product made by a prestigious company.
Medela is highly trusted by moms for its reliability, which is always reassuring.
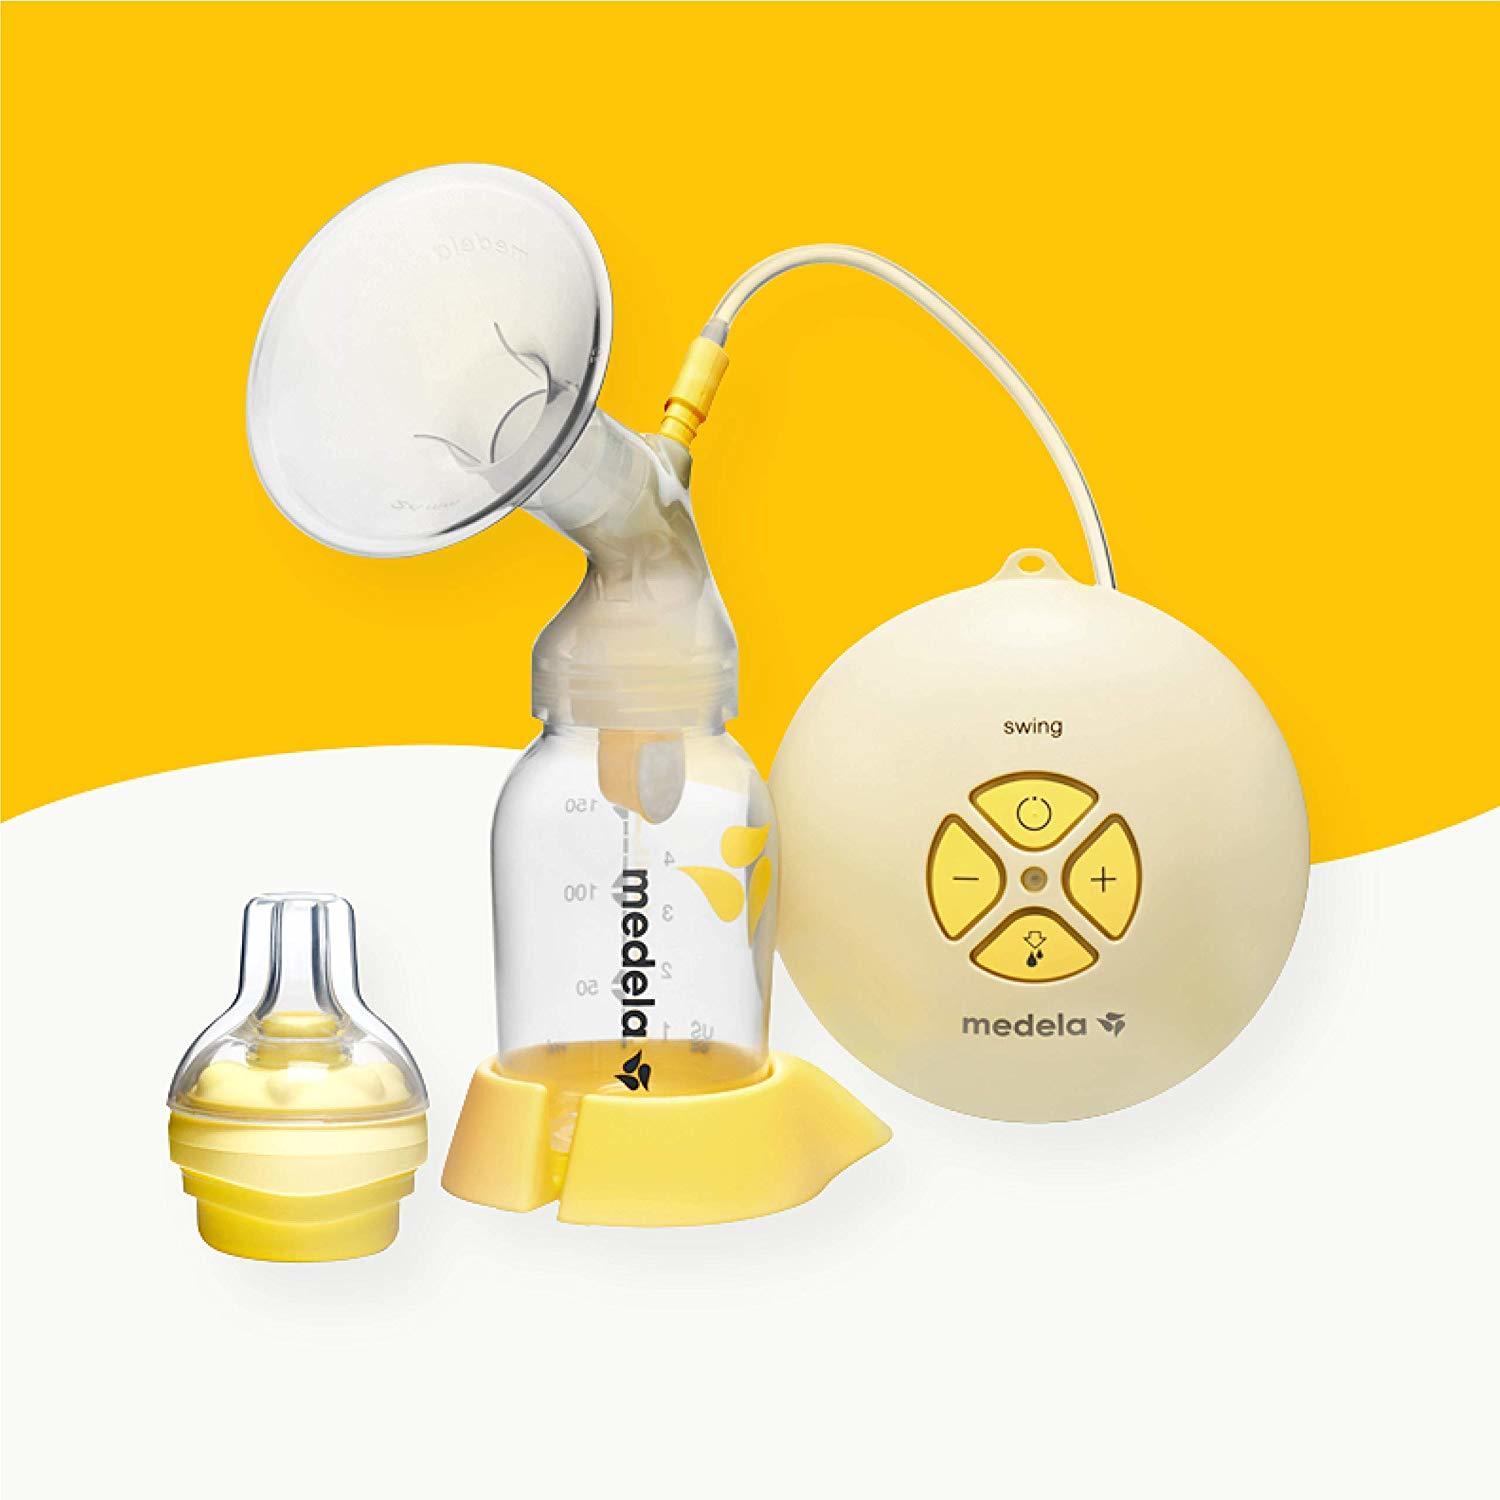
Key Features
2-Phase expression
Compact size
AC power or batteries
Pros
✓Lightweight ✓Quiet breast pump ✓Easy to use
Cons
✕Battery life is 1 hour only ✕Can express one breast at a time
There are over 650 reviews from moms on Amazon.com, rating this breast pump 4 stars out of 5.
Moms seem to be mostly happy with this breast pump, which is ideal for occasional or at-work pumping.
Although milk can get into the tubing easier than expected there is a trick to prevent vapor from getting inside the tub (which indicates there is moisture in there).
All you need to do is purchase the Medela Symphony longer tubing, which solves the problem.
There were a few reports that the unit was making quite loud vibration sounds. The hack described above, could fix it!
Moms that express frequently may need a more powerful breast pump. However, for those who need to pump just a few times per week, this pump seems to works perfectly.
As a piece of advice, always make sure all parts of your breast pump are properly assembled to ensure you can express the most milk possible.
Medela Swing Maxi Electric Breast Pump
Unlike the Swing Single, the Medela Maxi pump allows for either single or double pumping.
The benefit of a double pump vs. a single one is that it allows you to express double the amount of milk in the same time. Whereas with a single electric or manual breast pump you can only do one breast at a time.
Like the Single, the Swing Maxi double electric breast pump has a simple, compact design and simple operation (with only four buttons).
It is lightweight and highly portable. Plus, it can be operated via an AC power adapter or using batteries.
Medela Swing is popular thanks to the fact that it is very gentle on the breasts, and efficient at the same time.
For mothers with very sensitive nipples, it is recommended not to use any breast pump at is highest power level.
As soon as you feel discomfort, you should turn down your pump speed of suction, to prevent any injuries.
Medela Swing 2 phase breast pump
The Medela Swing electric 2 phase breast pump mimics the sucking behavior of a baby.
It starts with a gentle short but fast cycle to stimulate milk let down.
After 2 minutes the pump switches automatically to expressing mode, which consists of a slower, longer cycle.
The cycle can also be operated manually just by pushing the letdown button.
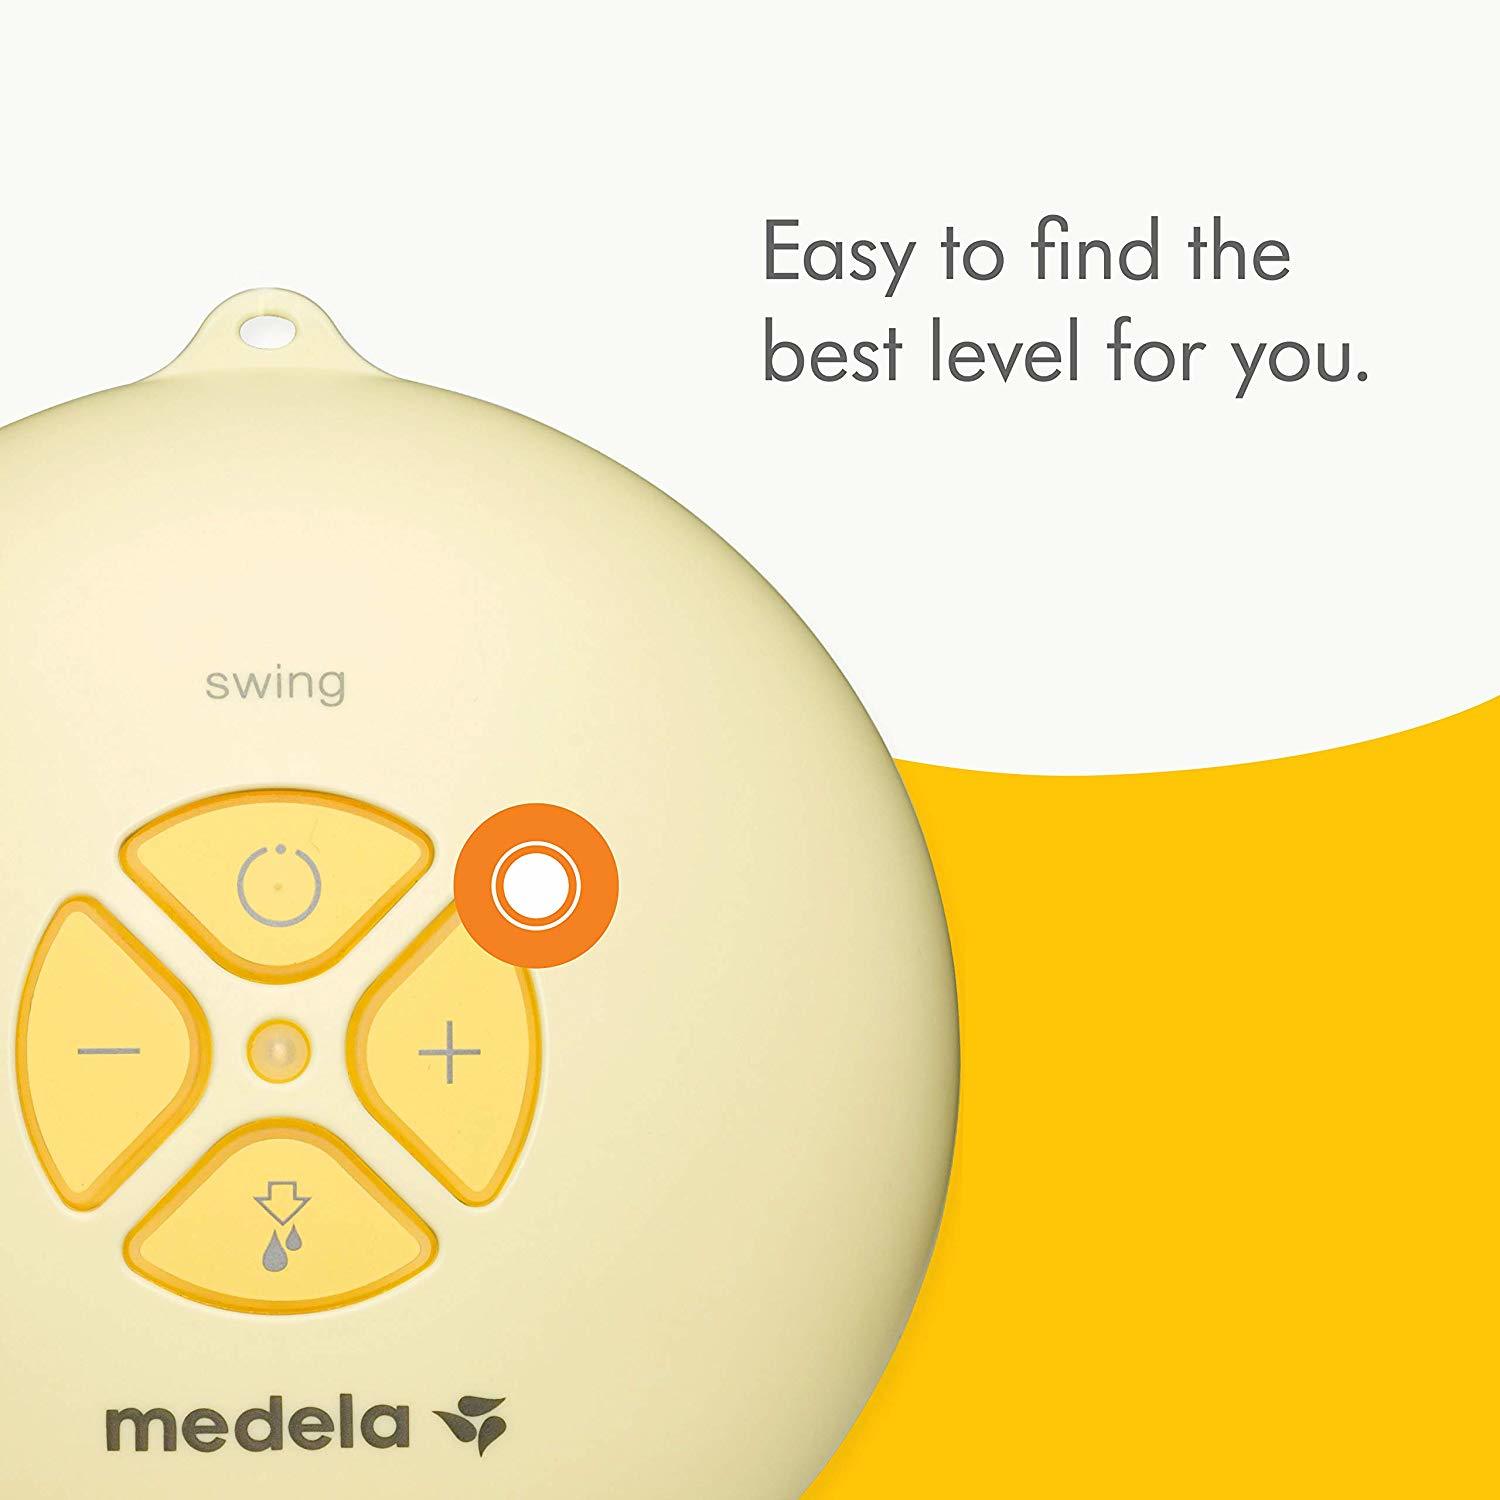
Easy breast pump use
The Medela Swing pump has only 4 buttons:
on/off
2-phase cycle
Up and Down (for power of expression)
Having only 4 buttons makes it easy to understand and operate.
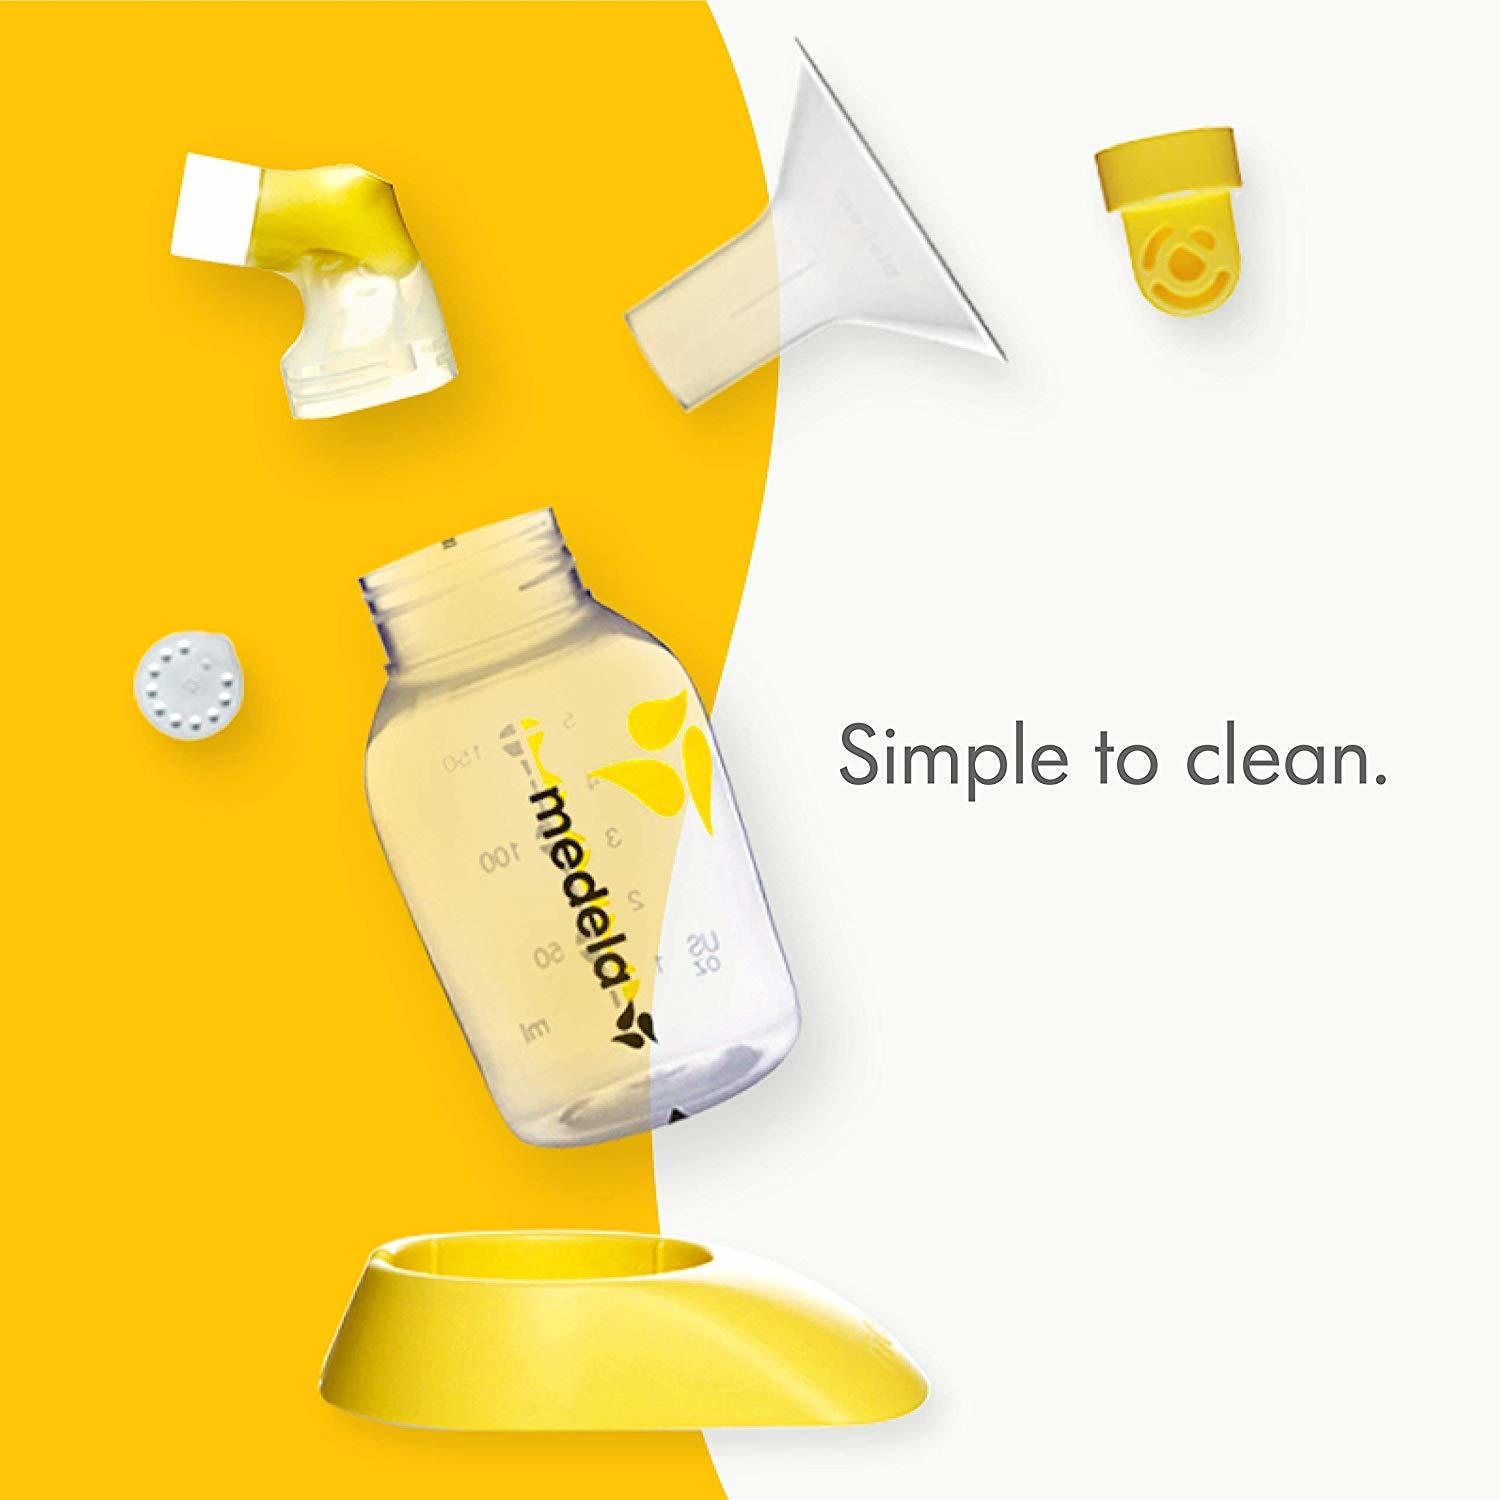
Besides, as the Medela electric pump comes with a small number of components it is quick to assemble and clean.
Pump and Go breast pump
The pump is very compact in size and light in weight (2 lbs or 900 gr), so it is easy to carry around.
It also offers the option of being a battery operated double breast pump, so you can pump on the go.
Medela Maxi vs. Single Swing Breast Pump – Differences between the 2
Being a double breast pump, Medela Swing Maxi will express double the amount of milk in the same amount of time as the Swing Single.
Because its motor is more powerful, the Medela Maxi Swing breast pump can express up to 18% more milk than the Medela Swing Single.
The reason the Medela Swing Maxi double pump is more powerful is because it is designed to express from both breasts simultaneously, using the same motor.
Although you can choose to express only from one breast using this pump just by inserting the short tubing into the tub holder.
Quiet expressions double breast pump
Being an electric appliance, there will be some level of noise coming from the operation of either the double or the single Medela Swing.
One tip to reduce noise whilst expressing with this pump or any other, is to place it under a cushion, which should minimize the noise a few levels.
You can also purchase a longer cable from Medela Symphony, which is compatible with the Swing model. In some cases this has helped some Amazon customers make their breast pump a few tones quieter.
Is this breast pump for me?
Your decision to purchase a breast pump should be driven by asking yourself how often you will need to express milk.
Check out our guide on how to choose the best breast pump for you, here; for a thorough guideline to help you on your decision.
If you will only be expressing milk occasionally, we would highly recommend the Medela Swing Single Pump as a good option.
The Swing Single and Maxi are considered 2 of the best breast pump for working moms, and moms on the go.
This is also a model recommended for stay at home moms who want to build a milk supply to separate from their baby for short periods of time.
For mothers who are pumping very frequently, it is important to consider a double breast pump, to save time.
If you are expressing 10 to 15 minutes from each breast, you will be saving that amount of time using the double variant every time you express.
Drawbacks of Medela Swing Single and Maxi
We have compiled a list of the top complaints from Medela Swing users. In an effort to add value, we’ve also compiled some possible solutions that could help troubleshoot your pump.
Medela swing breast pump not suctioning
A common issue seems to be the loss of suction power.
This could be due to different causes. It is always best to go through a checklist to ensure you are using your breast pump properly to get the best result:
Always check that the breast pump is properly assembled and everything fits into place
Check power points and batteries (we can all get that wrong from time to time!)
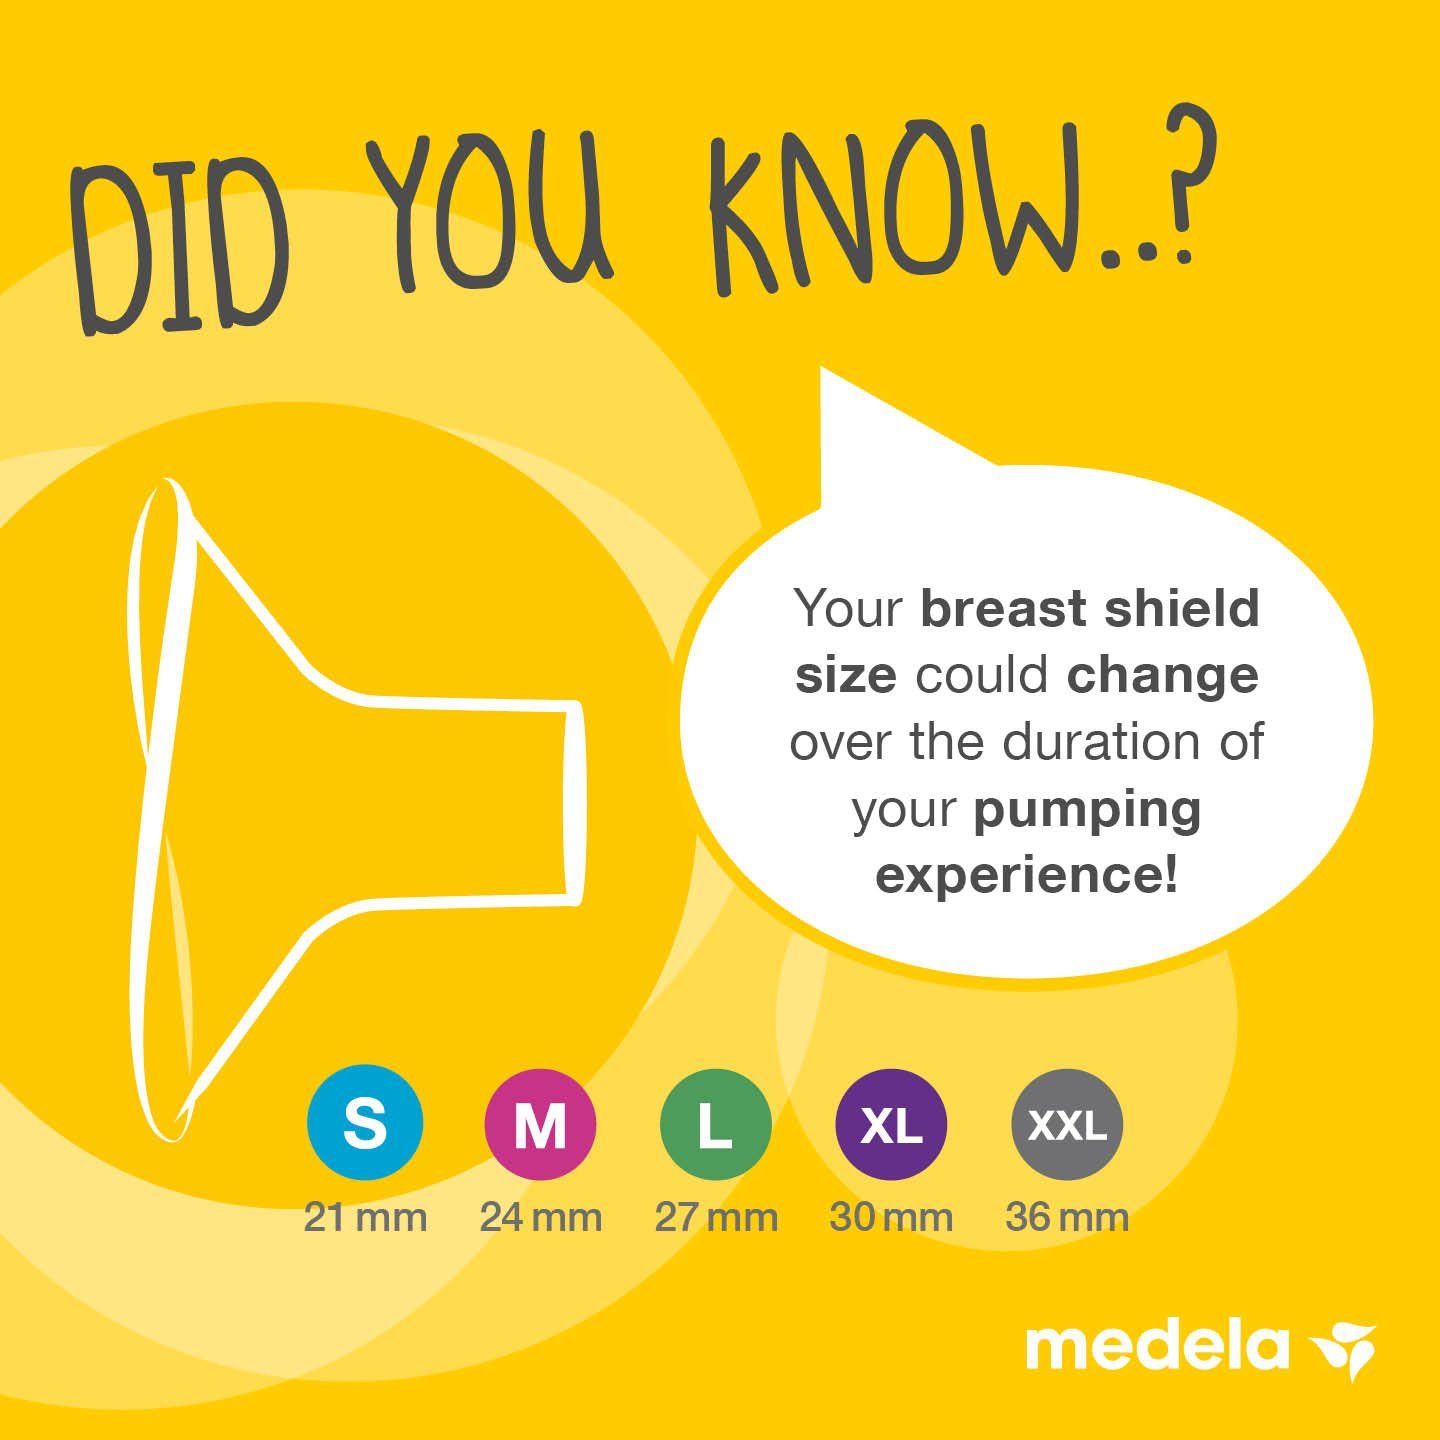
Medela swing membrane. The membrane is a silicon piece that opens to let the milk go into the bottle when you express. If this membrane is damaged or worn out in any way, it may prevent the vacuum from working at 100%, and it may seem that your breast pump has lost power. If your membrane is not in good condition, replace it immediately. Medela sells medela swing pump parts on Amazon
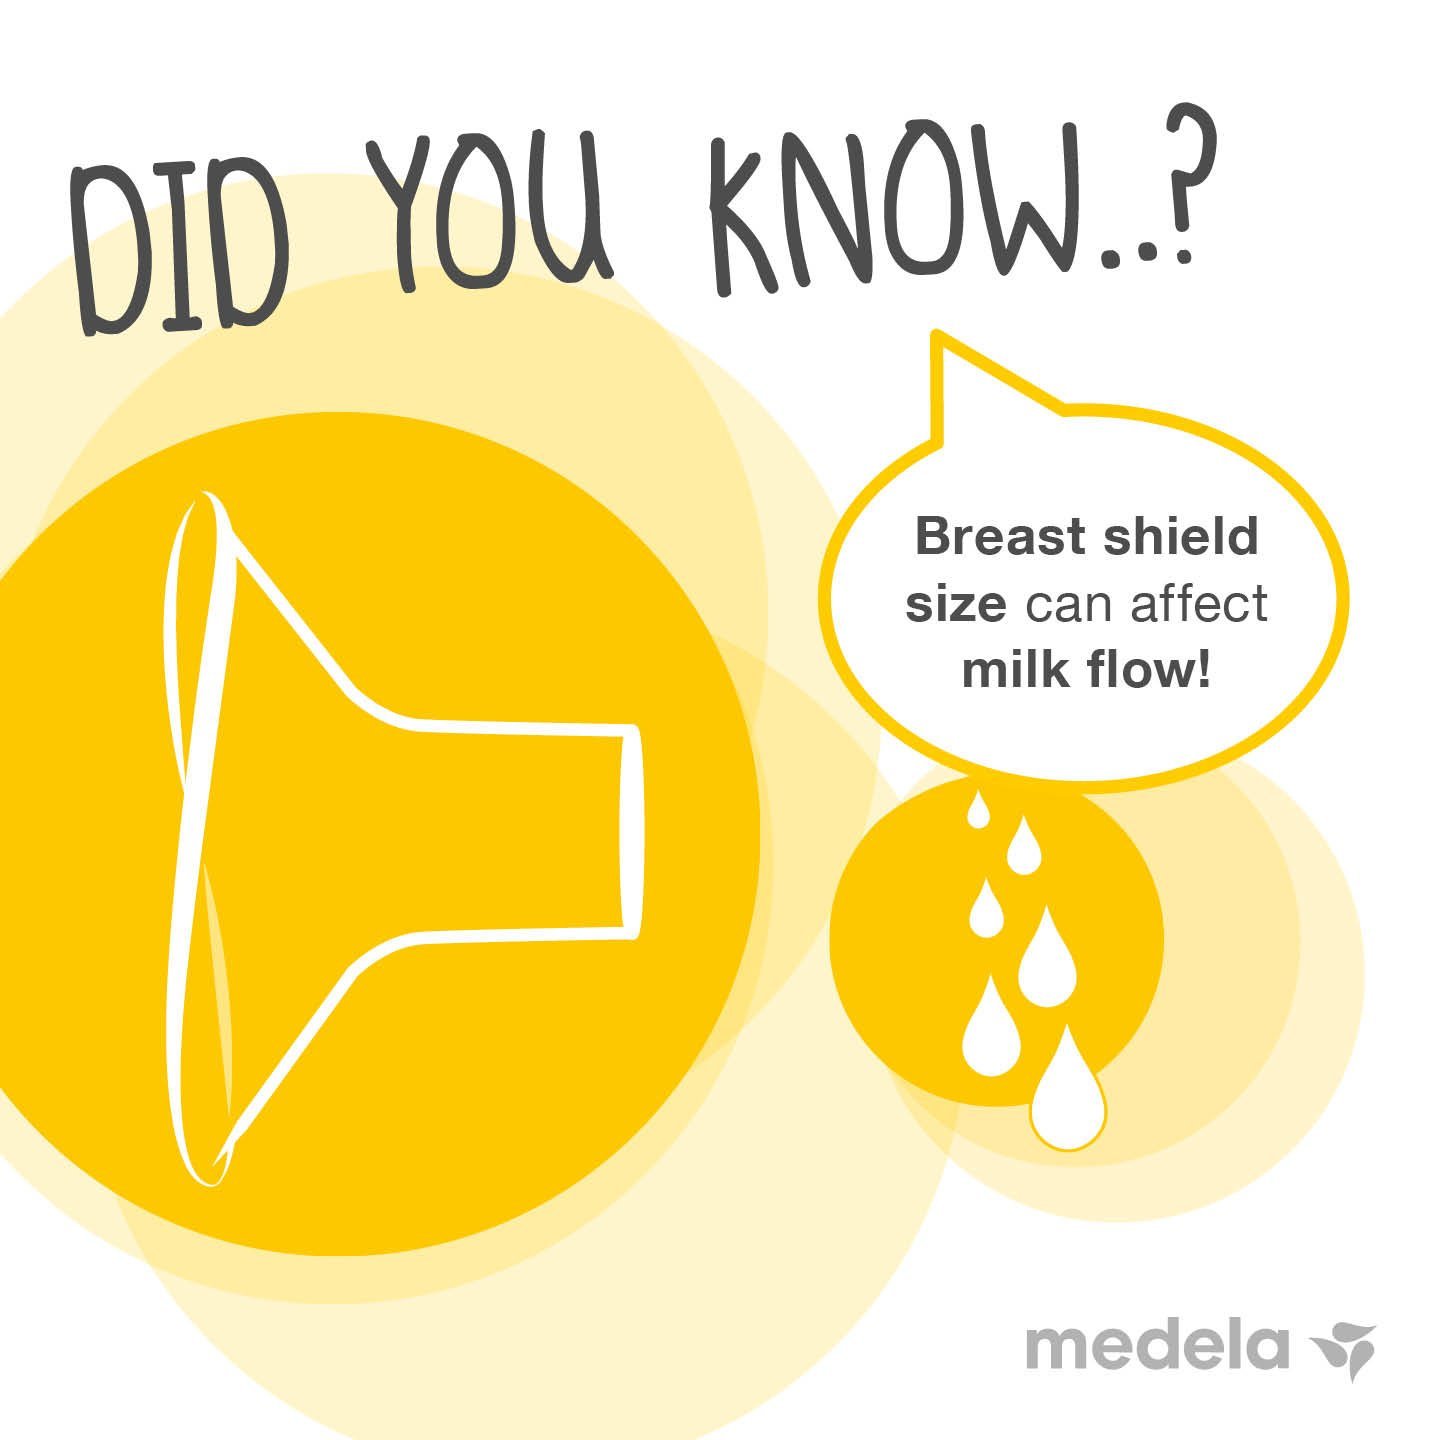
Medela Swing Shield. Is the size of the shield right for you? That may be impacting on suction. If the shield does not fit well, that may cause a problem with the vacuum. Always check that the shield is right for you. Medela sells shields of different sizes online.
Discomfort while expressing
If this is your case, we have 2 recommendations to make:
Check if you are using the right shield size
Make sure you do not use the breast pump at the highest power level
These are some ideas on what may be going wrong with the Medela Swing but by no means are the only possible causes.
There may be other reasons why you are in discomfort, so if pain persists it may be a good idea to contact your lactation consultant as you shouldn’t be in pain whilst expressing milk.
Swing has no LED display
Although this has nothing to do with how the unit functions, for some moms it is hard to tell what level of suction they are at, as there is not LED display or screen.
The Medela Freestyle has an LED display which includes a timer and memory for your favourite pumping program.
Unfortunately that feature is not part of the Swing model (neither Single nor Maxi).
Medela Swing Milk in Tube
It seems to be quite common to get some level of vapor or moisture inside the Medela Swing tube.
If you have owned your Medela Swing for a number of months our are using if frequently, it would be normal in the long run for some moisture or milk to enter the tube.
Moisture inside the tube should be prevented because it can cause mold in breast pump motor.
Apart from that, moisture or milk in the tubing can affect suction power and your pump may malfunction.
Open system breast pump
The reason moisture can enter the tub and pump is because the Medela Swing is an open system breast pump and not a closed system one.
In an open system pump there is no barrier between pump motor, tubing and milk bottle (they are all connected).
In a closed system breast pump, there is no risk of milk entering the pump and tube, as a barrier does exists.
Most pumps for everyday domestic use are open system. For this reason it is not recommended that breast pumps are shared or borrowed among users, as it cannot be guaranteed that germs and bacteria aren’t growing in the pump or tube.
What is a closed system breast pump?
Closed system breast pumps are used in hospitals, such as the Medela Symphony breast pump. This pump is designed to be shared among users and there is no risk of milk or moisture entering the tube and pump.
Closed system pumps are designed to pump during most part of the day, that’s why they have a powerful motor, are heavy duty and more expensive than open system breast pumps.
After doing some research we’ve complied a set of trouble shooting tips from Medela.com which could help sort this issue.
Medela Breast Pump Tubing and moisture
The best way to get moisture or milk out of your tube and pump is to flush out your breast pump:
1.Take off back of the pump and remove the batteries
2.Take out the black sponge that is placed at the side. Check if it is moist or wet with milk. If it is, wash it in warm water, rinse it and leave it to dry
3.Attach tubbing to pump and plug into power
4.Fill your sink with warm water and soap and place the end of the tubbing inside the sink
5.Turn the breast pump on. You will see that water will start going into the pump. This warm water will wash out any milk residue in your pump. Water will also come out of the pump. Let the water wash your breast pump for approx. 10 minutes
6. Then turn the breast pump off and repeat the process with clean water, to wash out any soap from inside your tube and pump (do this for approx. 5 minutes)
7.Remove the tube from the water and run the pump for 10 more minutes with no water, to help the pump and tube dry out. Don’t worry if your breast pump makes noises (check out the video to hear noise)
8.If after 10 minutes there is still condensation in the tubbing, take it out of the pump and spin it around and the centrifugal force will help remove any remains of moisture. Make sure nobody is around to avoid injuries.
Once all moisture is out of the tube, try your Medela pump again and it should work as per normal, at full vacuum power
If this troubleshooting doesn’t work, it is recommended you return your breast pump to the store where you bought it with your receipt.
You may want to check out Medela’s full video here, as it is very instructive!
We hope you enjoyed this review on the Medela Swing Single and Maxi. If you are ready to make a purchase, click on the links below to go to amazon.com


 Talk to your physician or lactation consultant about your concerns and they will tell you how to proceed in your specific case.
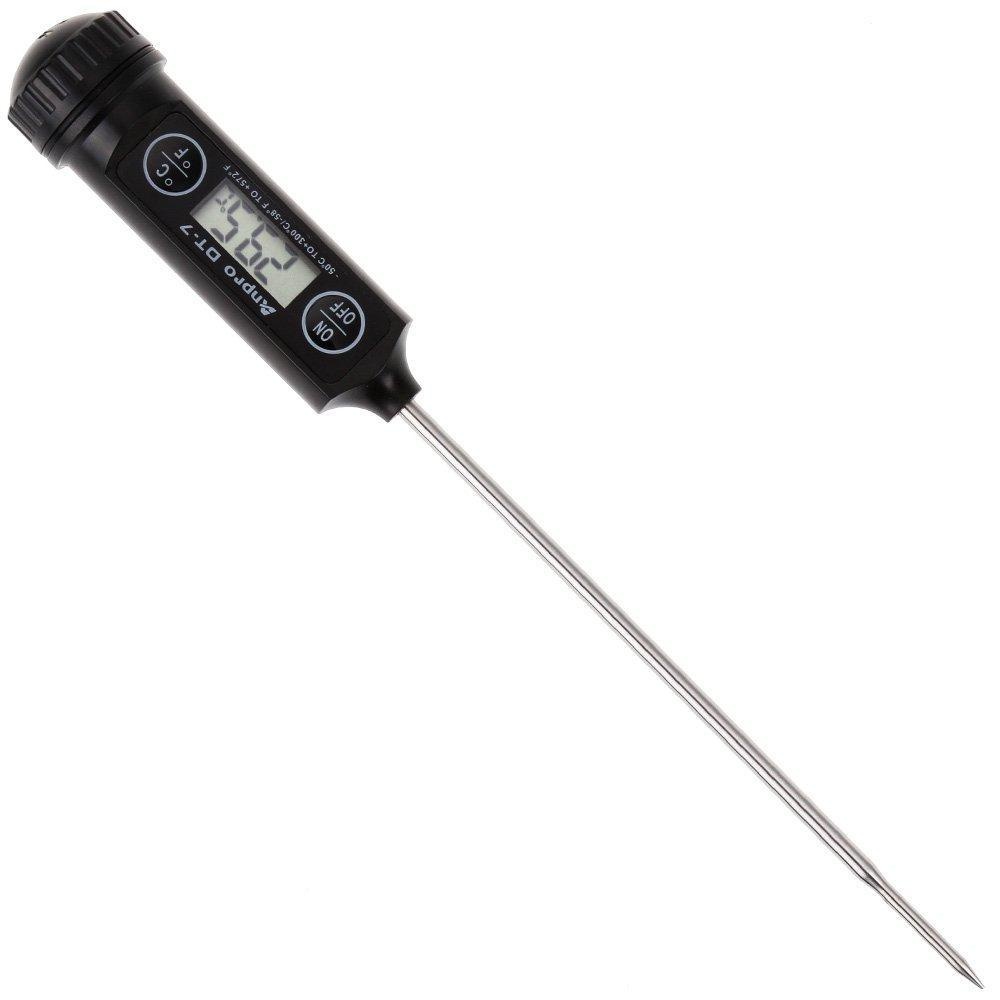


 [thrive_link color=’blue’ link=’https://www.roamingmommy.com/z254′ target=’_blank’ size=’medium’ align=’aligncenter’]Check Out on Amazon.com[/thrive_link][/one_half_last]
 [thrive_link color=’blue’ link=’https://www.roamingmommy.com/4idx’ target=’_blank’ size=’medium’ align=’aligncenter’]Check Out on Amazon.com[/thrive_link][/one_half_last]

 Baby bottle nipples have different shapes but also different flows. As your baby grows she will need a faster flow nipple to draw milk. Newborns always start with a slow flow nipple. Always check the label before buying a bottle as it will feature a guide on the recommended nipple flow by age.
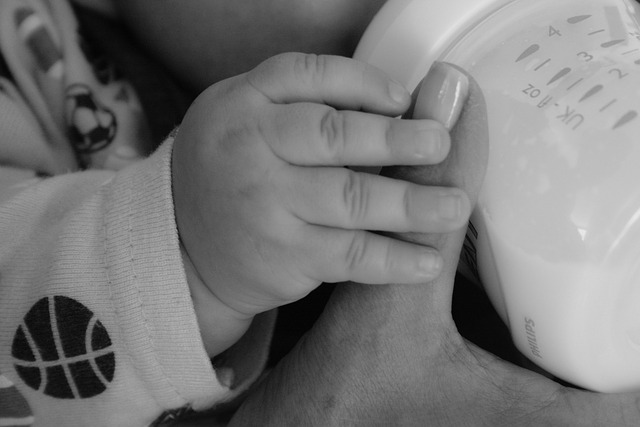 Nowadays most baby bottle brands come with an integrated colic-free system. It consists of a feature integrated to the nipple to prevent your baby from swallowing air bubbles, which could cause gas or colic.
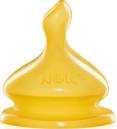
 If you are concerned about your baby being in contact with the chemicals found in plastics, then a glass baby bottle may be a good option for you. These bottles have been around for decades and many moms choose these over plastic ones.
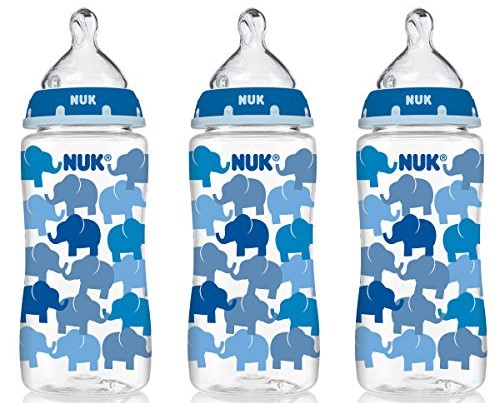 Plastic baby bottles are safe to use because they are made of food-grade plastic. In 2012 the FDA banned any baby bottles or sippy cups made of BPA material. Hence, if you choose to go with a plastic bottle, at least in the USA you can be sure you will get a BPA-free one.
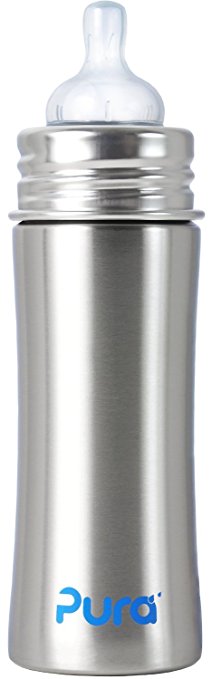 These bottles are also a great option for parents wanting to avoid plastic bottles. Some versions may be insulated, which means that they can keep the liquid inside warm or cold, such as a thermos would do.
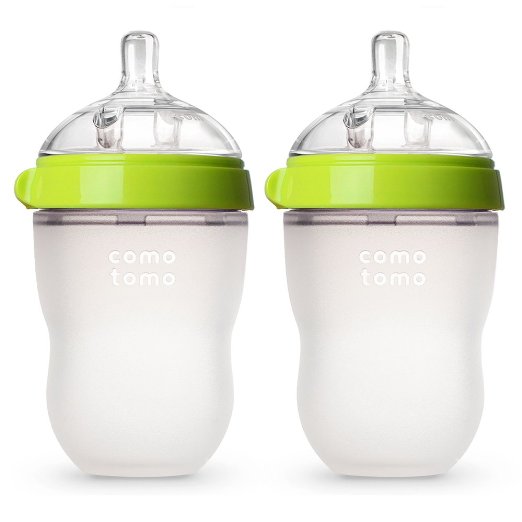 Silicone baby bottles are relatively new compared to other types of bottles. These bottles are soft to grab and they mimic a breast. Both the body of the bottle and the nipple are made of silicone.

 Most lactation consultants recommend introducing the bottle or pacifier after lactation has been properly established.
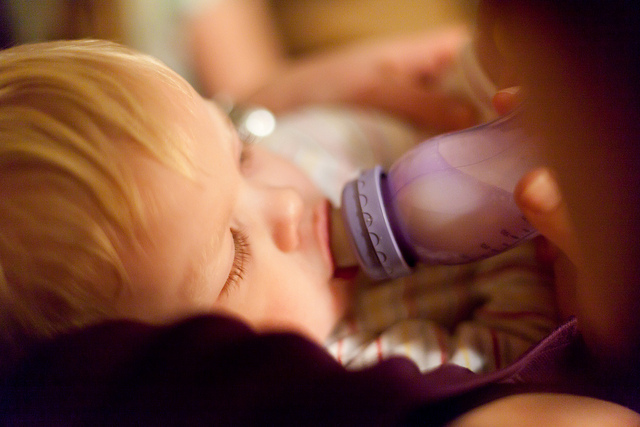
 It may take time for your baby to accept the bottle, so try not to give up and keep offering the bottle a little bit every day. Try increasing the amount of time you offer the bottle every day, without going to an extreme. If you have been trying for some time and your baby is very upset it may be counterproductive to keep offering the bottle at that stage as he will be really tired, frustrated and hungry.